The essential American West coast experience can be found in Sequoia and Kings Canyon National Park in California. With jaw-dropping vistas and I-can’t-believe-it glacial valleys, you’re not going to find anything more worth your time. And if there’s one hike in Sequoia and Kings Canyon National Park you need to make it’s the loop trail around Rae Lakes.
This is a multi-day hike, but the trail is well tended and marked clearly. The loop is one of California’s most popular outdoor destinations with good reason: it’s gonna blow your mind.
You’ll be immersed in everything the High Sierras have to offer, from sub-alpine ridges to meadows in the mountains. Wildlife encounters are practically guaranteed. By the end of this hike, you’ll have some great stories to tell, that’s for sure.
RELATED READING: Check out our main page for more guides on backpacking trails in California.
Table of Contents
Getting a View of It All
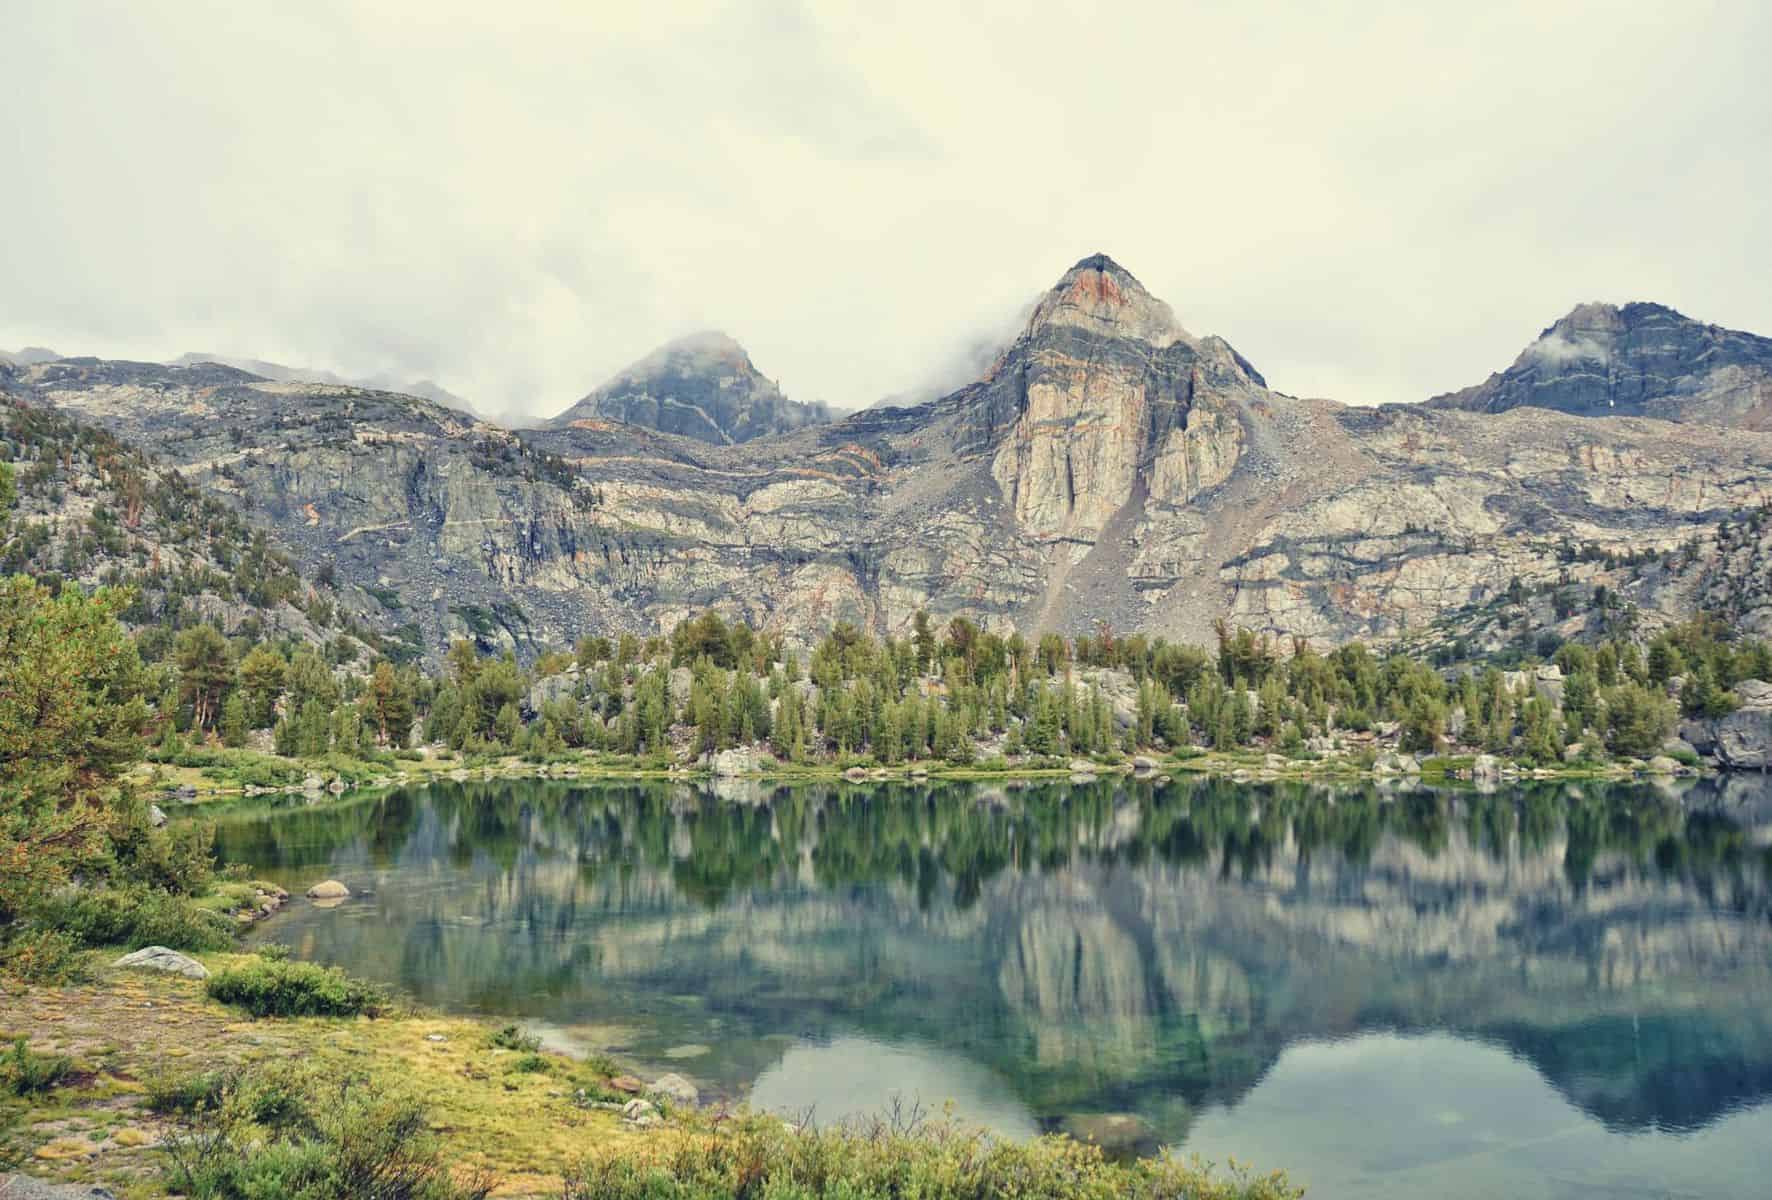
Centrally located in California, Sequoia and Kings National Park is part of the Sierra National Forest. The Rae Lakes trail is located in the eastern area of the park. Its highlight is, you guessed it, an assortment of large lakes perfect for swimming and photographing.
Related reading: If you’re planning on spending some time in the area then check out our guide to the best hikes in Kings Canyon NP.
The trail itself is a loop. Most hikers choose to go clockwise on the trail. This is the recommended route during the recommended hiking season between June and September.
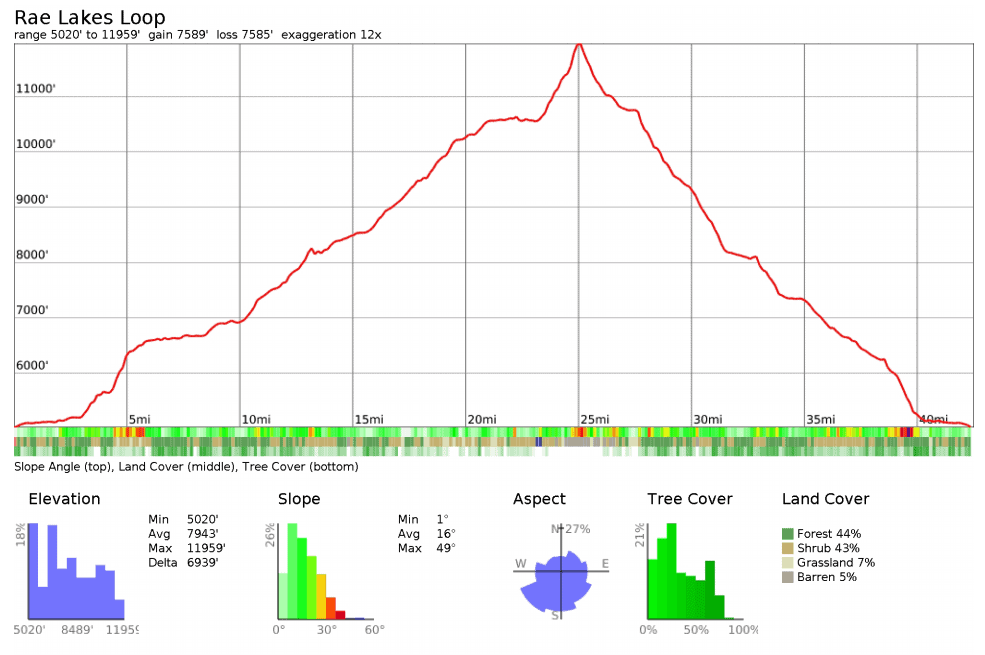
42 miles in length, Rae Lakes Loop is a multi-day experience. The trailhead has a starting elevation of about 5,000 feet, and hikers can expect to tackle nearly 8,000 feet of additional elevation gain during their journey.
Or, if you go counterclockwise, you’ll be challenged with a steeper gradient. Our guide on the Rae Lakes Loop will focus on the clockwise route.
Expect to take anywhere from 3 to 7 days to tackle this hike based on fitness level (or be a crazy ultramarathoner and finish it in 15 hours). Most hikers finish the trail in 5 days and take a zero-day at the lakes about halfway through the Rae Lakes Loop to swim and do some exploring.
The Rae Lakes Loop is a serious backpacking adventure intended for hikers with a good baseline fitness level.
Planning Your Trip
You can obtain a wilderness permit on a walk-up basis from September to May. However, the conditions for the Rae Lakes Loop are far from optimal during this time period. The busy season is from June to October, and during this high-volume travel period, you’ll need to apply for a permit before your journey.
It’s possible to luck out with a walk-up permit but it’s also unlikely, so plan ahead and get that permit early.
If you arrive later than 9 AM on your day of travel, your reservation will be given to walk-up hikers. A simple phone call will help reserve your permit if you’re going to be late retrieving it.
Drive on California highway 180-East to reach the trailhead. You’ll find a large parking lot at Road’s End, perfect for leaving your vehicle for the duration of your trip. This highway is closed in sections from January through April!
Expect to spend each night of your journey at any of a handful of established campsites. They are spaced at regular intervals to suit your intended pace and all feature food lockers.
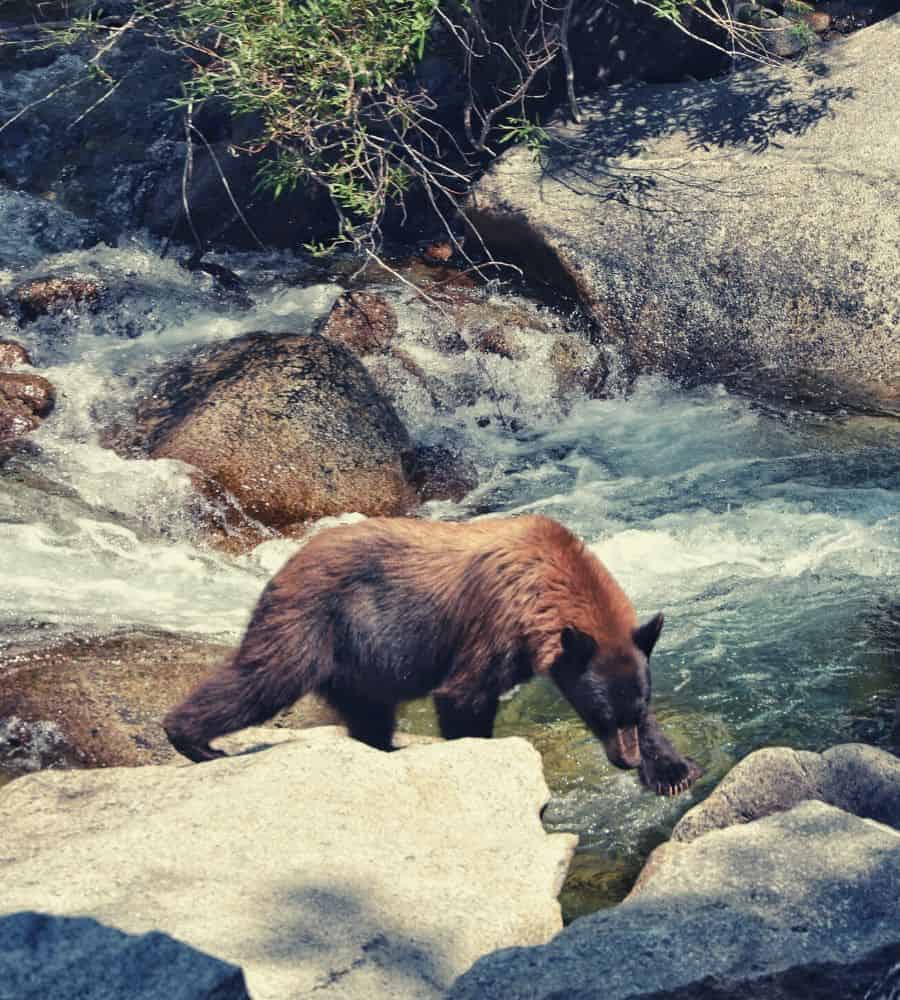
There Be Bears Here!
A special note, bears are a common site on the Rae Lakes Loop and can be troublemakers. They are active and skilled at procuring your carefully stored food.
Use of bear canisters or food lockers is required for all overnight hikers on the Rae Lakes Loop. If you don’t have your own bear canister, no need to fret; you can rent one at the park for a nominal charge.
NB: Bear spray is not allowed!
Show Me the Way: Ray Lakes Loop Itinerary
Because the Rae Lakes Loop trail is… well, a loop… there are two directions a hiker can go. The highest point of the hike is midway through at Glen Pass, towering at 11,926 feet.
This option provides a slightly gentler ascent in the first day of travel and is the preferred method of travel for most regular hikers on the Rae Lakes Loop.
You’ll want to tackle this route between July and September to capitalize on the dry season. Some of the stream crossings and mountain ascents become treacherous with snow and snowmelt, especially at the highest elevations.
We’ve broken the trail into five days for your convenience, with one-zero day in the middle.
Day 1

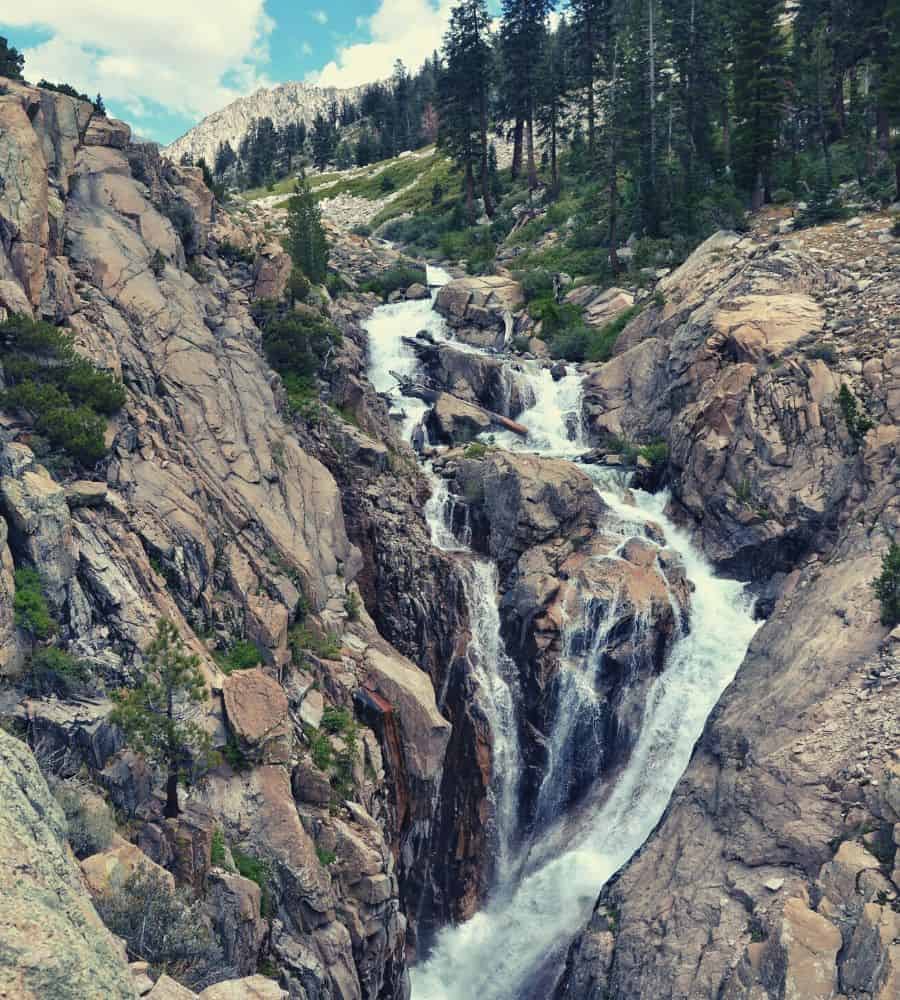
Begin your hike from the parking lot and experience two things off the bat: the soaring granite mountains surrounding you, and some hot weather. These first few miles can be sweltering, but the temperatures and trail will rapidly descend to a wetter terrain.
When the trail reaches a junction with three routes, you’ll turn left to follow the Kings River on the Woods Canyon Trail. As the terrain flattens and settles, the river does too. Hike through some scattered conifers and keep your eye out for the Paradise Valley campsites nearby the trail. The final campsite can be found shortly after crossing the bridge over Woods Creek.
Day 2
The first few miles of your second day will feature undulating trails eventually opening up into a glorious meadow. You’ll pass over giant slabs of granite with towering mountains surrounding you and juniper shrubs scattered around.
Work your way through a dense forest, and you’ll find yourself on the fabled Pacific Crest Trail. Campsites are organized in this area for folks breaking the Rae Lakes Loop into bite-sized chunks.
Stay to the right of the trail, and you’ll find yourself at the Woods Creek Bridge. If you’re afraid of heights, you probably won’t be hiking on the Rae Lakes Loop, but this shaky bridge could still set off a case of vertigo. Cross the bridge slowly and carefully, and find some nice campsites on the other side of the bridge.
Continue hiking as the trail climbs through thick coniferous forests. Take regular breaks to enjoy the view around you as you ascend into the High Sierras. This elevation thins out the forest and fills in that space with grasses and shrubby trees.
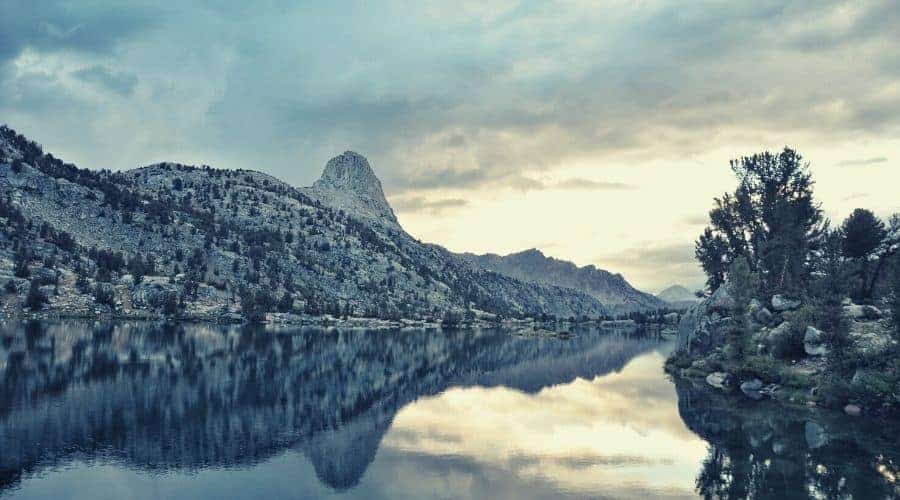
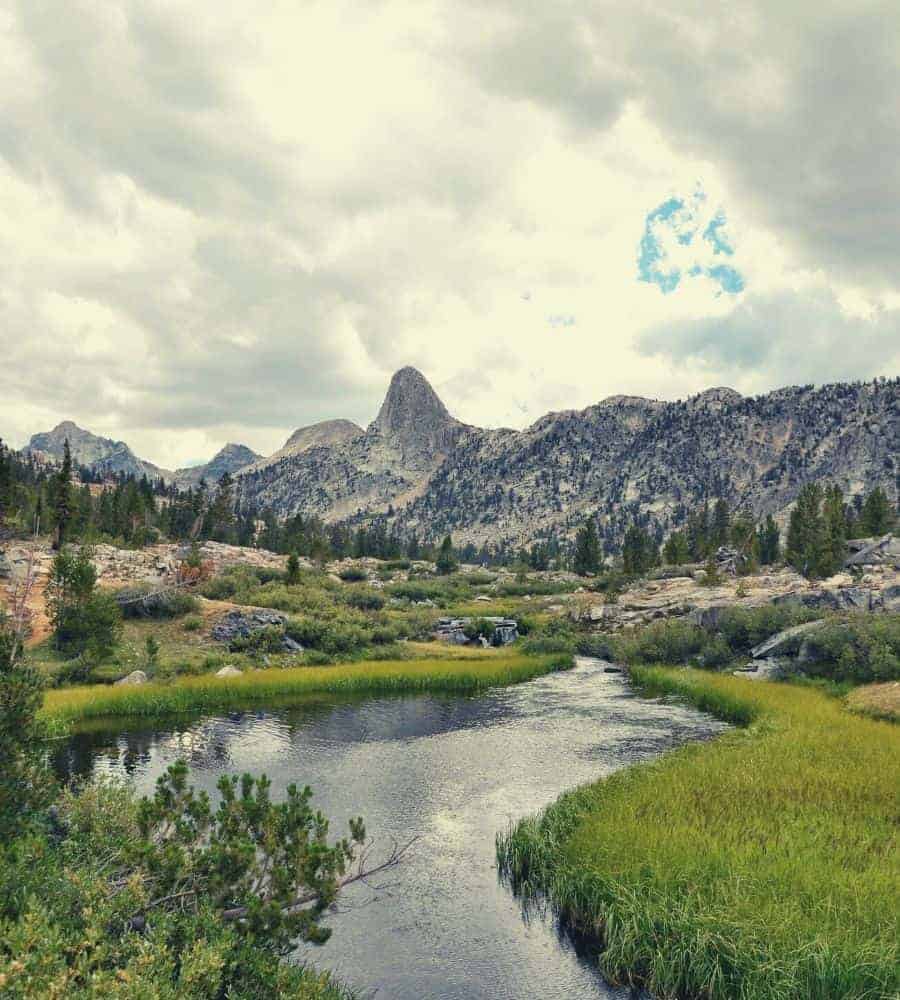
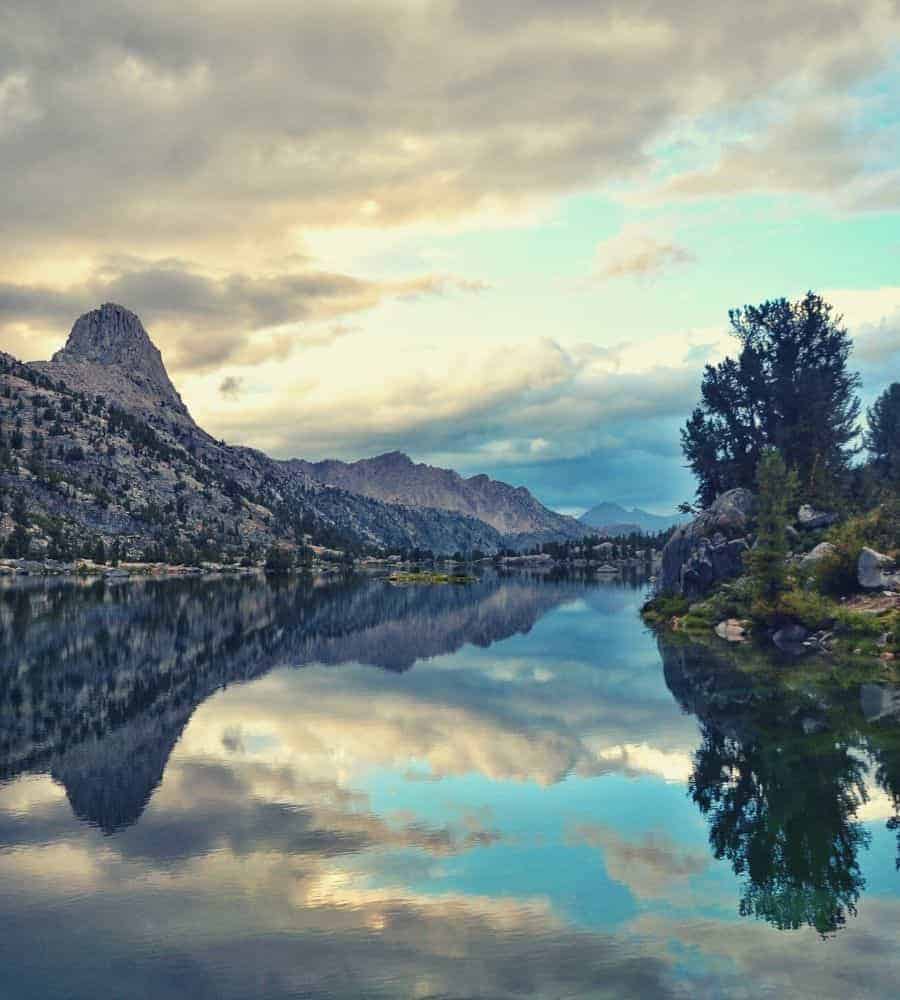
At about eighteen miles into the Rae Lakes Loop you’ll find Dollar Lake and Arrowhead Lake, but keep those feet moving. Your ideal campsite is a few miles ahead at Middle Rae Lake, the largest and most picturesque body of water on the Loop.
Look for signs indicating safe food storage and campsites at Middle Rae Lake.
Day Three
We recommend setting up camp here and taking a zero-day exploring the lakes. Take advantage of that two-night stay, folks, and get some well-earned rest. You’ll need that energy for your next day of hiking!
Day Four
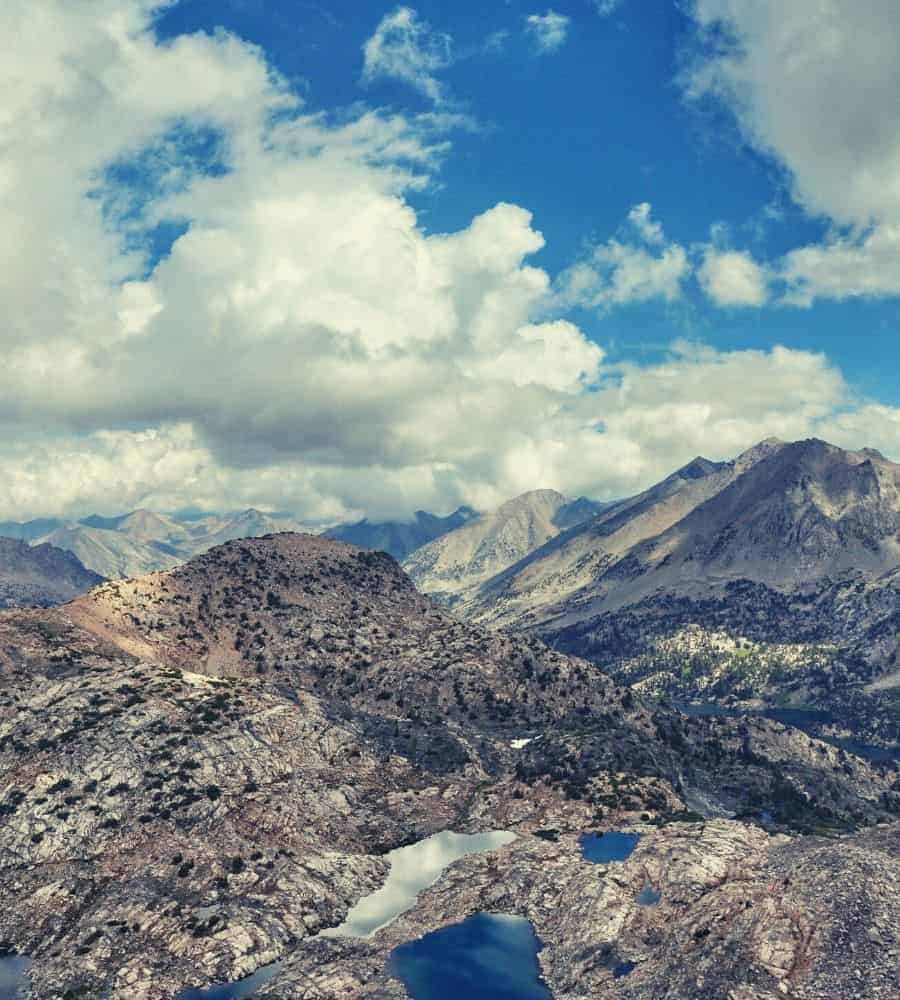
Hope you’re ready to do some serious climbing! In the first few miles of your day, you’ll reach the top of Glen Pass. That bad boy stands at nearly 11,998 feet. If you jump high enough you’ll break 12k and can cross that off your bucket list.
There is regular snow late into the season on Glen Pass, so this is where crampons and careful footing come into play. Try to follow the steps other hikers have made to find the safest route.
Once you’re over Glen Pass, you’ll descend quickly through a rocky canyon and will be greeted with an excellent view of Charlotte Lake. You’ll pass a trail junction leading to Kearsarge Pass; a quarter mile beyond it you’ll take a second junction leading towards Charlotte Lake to continue the Loop.
The trail descends quickly to Vidette Meadow, our suggested overnight stay for your third day of travel. Food lockers are present, and you’ll look forward to about twelve more miles of hiking tomorrow on your last day on the trail.
Day Five
Mountain lakes and enormous granite slabs are the highlights of this trip, but your morning hike through Junction Meadow might be the best part of the trip. It’s a close-up look at the ecosystem of the High Sierra country and the best way to start the last leg of your trip.
You’ll descend through Lower Bubbs Creek Canyon and Sphynx Creek (the final spot for camping on the Loop), passing through a forest of pines and firs. Watch your footing on steep switchbacks that lead to the floor of Kings Canyon, and then cross a series of bridges to reach the home stretch leading back to Road’s End and your car.
Campsites
There are a few designated campsites along the trail, and most will have maximum stay limits. We’ve selected a few nice locations here for your trip, whichever direction you choose to go.
|
Campsite |
Clockwise Distance |
Counterclockwise Distance |
Duration Limit |
|---|---|---|---|
|
Middle Paradise Valley |
6.8 miles |
34.6 miles |
2 Night Limit, Designated sites only |
|
Woods Creek |
15.7 miles |
25.7 miles | |
|
Rae Lakes |
22.7 miles |
18.7 miles |
2 Night Limit |
|
Junction Meadows |
31.1 miles |
10.3 miles |
Middle Paradise Valley |
|
Sphinx Junction |
37.5 miles |
4.1 miles |
Middle Paradise Valley |
Always practice your Leave No Trace ethics! This is especially important considering the dry alpine environment you’re in.
Never start a fire above 10,000 feet elevation. That’s a law, and one you should pay special attention to considering California’s history with wildfires.
A special consideration to take when camping at the Rae Lakes Loop is the sensitive, fragile ecosystem of the mountains in the Sierra National Forest. The plants that grab hold in this unforgiving terrain can take years to recover from a single footprint, let alone the devastation a campsite will cause.
You’ll have to pack out your toilet paper too. The used stuff. I know, it’s gross, but it’s the price we pay to enjoy pristine wilderness. Some ziplock bags will make the trip home a little less foul, at least until you unpack them.
Good to Know
Besides the threat of bears tearing through your food supplies, most hikers will complain about the clouds of man-eating mosquitoes. Those bloodsuckers are at their worst during prime hiking season. Everybody seems to have their preferred method of preventing insanity from mosquito bites, and you’ll see my own in the next section.
The trails are also quite dusty during the summer months. Some hikers will sport a bandana to sift through the dust.
A bridge running over a river washed out at the end of 2017, and the replacement isn’t scheduled for construction until 2019. This note is from the NPS website and is a word-for-word warning;
The South Fork Kings River Bridge above Paradise Valley washed out during the winter of 2016-2017. Construction of a replacement bridge will not begin before 2019. Depending on conditions, crossing the South Fork of the Kings River can be extremely hazardous. Observe conditions carefully and then evaluate the risk of crossing. Be prepared to turn back. If you hike the Rae Lakes Loop beginning from Bubbs Creek, plan for the possibility that you may have to backtrack to safely reach Cedar Grove.
Practice the greatest caution at this point of the trail and as the official warning says, be prepared to turn back. It’s a great hike but it ain’t worth your life
Suggested Gear
Food and Drink
You’re going to need a lot of food for this one. Water is generally plentiful on the Rae Lakes Loop so you won’t need to carry more than a few liters with you at any time (plus something to purify it like iodine), but all food must be packed in.
Freeze-dried foods are a good option. I’d rather carry in and out the weight of canned foods, but I’m a masochist. Some rice is always a welcome meal on a long trip.
You can’t forget that vital get-me-going cup of coffee in the morning. My buddy got me hooked on Instant Vietnamese Coffee, and I thank him regularly for introducing me to it. Great taste at home, but in the backcountry?
Forget about it. That stuff is great.
The Right Clothing
A few bandanas are a smart choice for this trip. You’ll use them to ward off dust, mosquitoes, and to prevent sun exposure on your neck. If it’s a hot day you can soak that baby up in cool water and wear it as portable climate control.
I recommend a Tilly hat for anybody who spends a good amount of time outdoors. It’s a strong, durable hat that’s comfortable and guaranteed for life.
Because of the plentiful opportunities to cross streams and wade through lakes, a simple slip-on shoe like Crocs is a great lightweight choice. They’re also great for kicking around camp and look super, super cool, no matter what anybody tells you.
I’ve always preferred a lightweight shoe over a heavy boot, so I suggest the La Sportiva Helios for most hikes. For a trip of this length, you might want to add something with a little more protection if you aren’t nimble and light on your feet.
For sections of this trail at the highest elevation crampons are recommended for when the snow gets icy and slick.
Resources
We’ve looked at a few of these throughout the post, but let’s pop them into one convenient reference.
- For wilderness permits, you’ll want to click here. There is a quota from May to September, but September to May is a “walk-up period” due to decreased park traffic.
- You’re going to need a bear canister on the Rae Lakes Loop. If you don’t have your own, you can rent one here.
- The NPS website is the place to go for finding a map of the Rae Lakes Loop trail.
- A map is essential for trips into the backcountry, and this map of the Rae Lakes Loop is durable and easy to read.
- Want to talk to a person about this trip? Call the Sequoia and Kings Canyon National Park Ranger Station at (559) 565-3341. You can email them as well but responses can be delayed, and the rangers prefer a direct phone call.
Packing Up Camp: Rae Lakes Loop
There we have it, all you need to get down and dirty with the Rae Lakes Loop. Plan your trip well and call ahead to the ranger station for any questions or concerns you have about the state of the trails, or ask us here and we’d be happy to chime in.
Enjoy yourself out there, and don’t be afraid to play it safe.

