
Whether you’re a weekend warrior, a regular backpacker, or a camping enthusiast, the chances are you already know that vegetables provide all the nutrients needed to fuel any outdoor adventure. The only problem is, bringing fresh fruits and veggies to the backcountry ain’t easy!
What if we told you there was a practical way to enjoy nutritious vegetables wherever the trail takes you? There is! Dehydrating your food offers a convenient and nutritious alternative to fresh veggies, and they’re also ideal for long-term travel on the trail.
In this informative guide, we share which veg are the best for dehydrating when backpacking, camping, or any other outdoor activity. We’ve included plenty of cooking and storage tips along the way, so keep reading to learn more!
Save for later!!! ⤵️

Table of Contents
Why Dehydrating Food Is the Way to Go
Bringing along fresh produce on the trail or mountain is a challenge. Not only are fresh fruits and vegetables heavy and bulky, but they can also easily bruise or spoil in a backpack – not exactly ideal for the rough and rugged lifestyle of an outdoor enthusiast.
By dehydrating, you’re automatically reducing their weight while still preserving most of their nutritional value, just like with dried fruits, and increasing fiber content. Dehydrated foods can also pack down to a fraction of the size of their fresh counterparts, making them easier to store in a crowded pack.

Another bonus is the easy prep and faster cooking times. By preparing dehydrated foods at home, you save time and fuel rehydrating them in the field. This is especially true for foods like grains and legumes.
If you’re tired of powdered soup and trail mix, dried vegetables allow you to enjoy more diversified meals in the backcountry. Eat them as snacks or add to soup, pasta, noodles, rice, eggs, and more!
As if all these benefits weren’t enough, dehydrated veggies can save you money, too! Store-bought backpacking food and dehydrated meals are notoriously expensive. Dehydrating your own food allows you to cut costs and save money.
Best Vegetables to Dehydrate – Our Top 13 Veggies
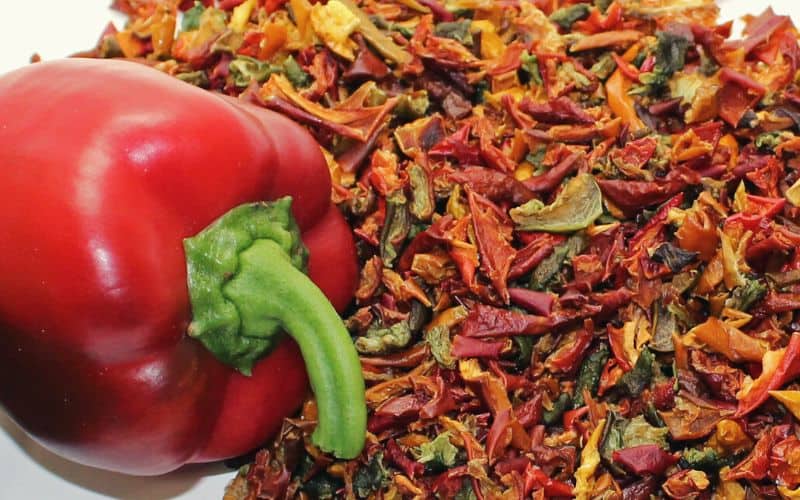
1. Bell Peppers
Bell peppers of all colors dehydrate well and yield a nice, intense flavor when dried. After dehydrating, bell peppers become sort of “meaty” and make excellent additions to wraps or sandwiches. You can also try adding dried bell peppers to chili, soups, or pasta.
To dehydrate bell peppers, start by removing the ribs and seeds and slicing them into strips roughly ¼ inch thick. If you’re using a dehydrator, they should take roughly 4–6 hours to dry at 125°F (52°C).
If you’re using an oven, they will take approximately 4–6 hours at 200°F (93°C). With the oven method, you’ll also want to crack your oven door open about 2 inches to allow moisture to escape.
2. Zucchini
Possibly our favorite dehydrated vegetable! To prepare your zucchini for dehydration, wash them, cut off the tops, and remove any seeds that have formed. You can cut your zucchini into slices, dice them, or even shred them.
If you cut your zucchini into roughly 1/8″ thick slices, you can salt them generously after drying and they become delicious chips – the perfect nutritious, lightweight, and shelf-stable snack for the trail or the mountain.
However you slice them, make sure you layer your zucchini on your trays without overlapping them. Place them in your dehydrator and dry them at 125°F (52°C) until completely dry.
You can also dry zucchini at a really low temperature on baking sheets in the oven. Start at 125°F and check every hour for dryness. Remove them from the oven only when they are completely dry.

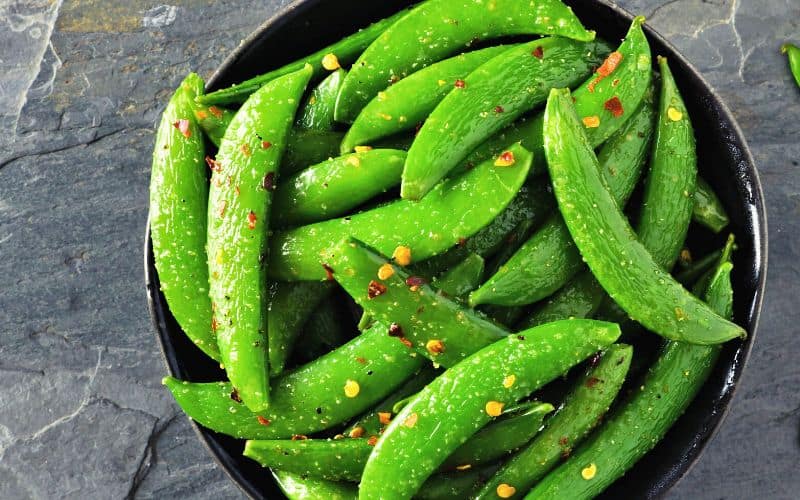
3. Sugar Snap Peas
Sugar snap peas can be turned into crunchy and delicious chips by dehydrating them. You can also add them to stir frys, soups, or chili, or eat them as a side.
To get started with the dehydration process, clean your snap peas and place them in a bowl. You can use either fresh or frozen peas. Generously coat them with oil and add salt and pepper. You can leave them plain like this or add all sorts of seasonings like onion powder, garlic salt, and nutritional yeast (for cheesy flavor!)
If you’re using a dehydrator, place your sugar snap peas on your dehydrator tray without any overlap. Dry them at 135–140°F (57–60°C) for around 8 hours.
You can also dry them in the oven. Just set your oven temp at 170–180°F (76–82°C) and place your tray of snap peas in the center. Prop the oven door open about 1 inch. Sugar snap peas dry quickly, so be sure to check after around 4 hours.
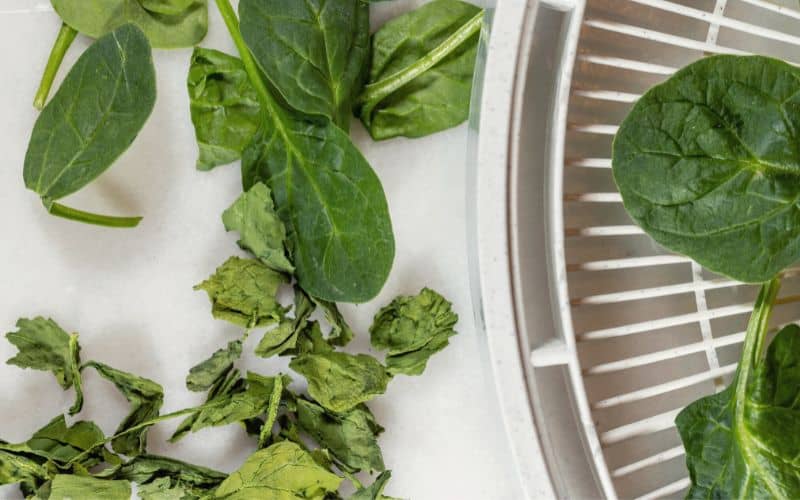
4. Spinach
Dehydrating spinach is the ultimate way to incorporate some greens into your camping or backpacking meals.
Spinach is jam-packed with nutrients like Vitamin A, Vitamin C, calcium, iron, and folate. You already know how lightweight spinach is but when dried it becomes incredibly compact, too, making it perfect for throwing in your pack.
Dehydrating spinach is easy. Start by washing and drying your spinach leaves. You’ll want to make sure they are completely dry before dehydrating.
Arrange your spinach on your dehydrator trays. It’s ok for there to be some overlap as long as hot air can circulate. Dehydrate at 125ºF (52°C) for around 4–8 hours. You’ll know it’s done when it easily crumbles. If it bends rather than crumbles, it needs more time.
When dried and stored properly, dehydrated spinach can last for six months and sometimes more. Just be sure to store your spinach in a clean, airtight container like a Ziploc bag or glass jars.
Did you know you can also hang dry spinach? People have been conserving herbs with this method for centuries! The process is much longer (about 3 weeks!) but it’s easy and inexpensive.
Just wash and dry your spinach and then tie the stems together with Butcher’s string. Hang in a cool, dry place that won’t get hit by direct sunlight. It will take up to 2-3 weeks depending on how much water is still in the spinach.
5. Butternut Squash
Dehydrated butternut squash makes a delicious addition to meals, soup mixes, and desserts. However you use it, butternut squash will add plenty of flavor, texture, and color to your backpacking or camping meals.
Start by peeling your squash and dividing it into 4 parts. Remove the seeds and the stringy parts. Cut these parts down into cubes about half an inch thick.
Before dehydrating, you’ll need to steam your squash for about eight minutes until it’s soft but not mushy. Place your cubes on your dehydrator trays and dry them at 135°F (57°C) for about eight hours.
You can also turn butternut squash into a powder that can easily be transformed into soup around your camp. Begin by creating your favorite butternut squash soup. Make sure to run it through a blender to ensure it’s smooth.
Cover your dehydrator trays with non-stick sheets and pour your soup over them in a thin layer. It will take about 10 hours at 135° F (57°C) to completely dry. Dried butternut squash soup will be brittle and easy to snap into smaller pieces.
Break the soup into smaller pieces and then grind them into a powder. On the trail, you can turn this powder into a tasty soup by combining it with water and bringing to a boil.

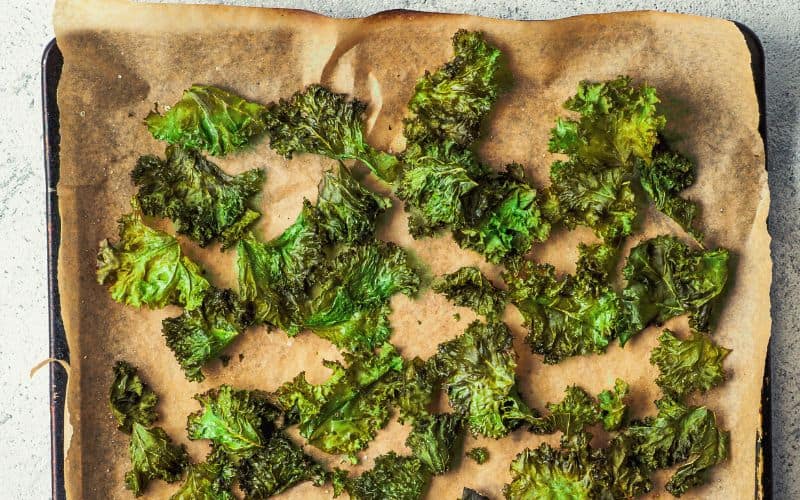
6. Kale
When it comes to dried foods, kale is a powerhouse! You can easily turn kale into crunchy veggie chips or a green powder you can add to your meals. You can also add dehydrated kale to soups, salads, and eggs.
Prepare your kale by stripping away the leaves from the leafstalk. Wash the kale leaves and dry them (a salad spinner can help here).
Tear the dried kale leaves into pieces that are slightly larger than your average chip. Toss the kale in a large bowl with olive oil and salt. If you plan on enjoying your kale as kale chips, we recommend adding some extra seasoning like cayenne for spice or nutritional yeast for a cheesy flavor.
Spread the leaves on your dehydrator trays in a single layer. Dry the kale at 155° F (63° C) for about an hour. Reduce the heat to 115°F and dry for an additional 3 to 4 hours until completely dry.
7. Potatoes & Sweet Potatoes
Dried vegetables like potatoes and sweet potatoes make a great addition to any pantry. Not only can you use them in your own home cooking but they also make delicious trail food.
Potatoes can be dehydrated in several ways – sliced, diced, shredded, or even puréed. The style of potato you choose will affect your cooking method.
For sliced or cubed potatoes, you’ll need to bake them for about 35–45 minutes before dehydrating. Place your cubed or sliced potato on mesh dehydrator trays. Dehydrate sliced or diced pieces at 125°F (52°C) until dry and leathery throughout.
You can also turn sweet potatoes into delicious fruit leathers – a sweet and tasty dehydrated food that makes a great hiking or backpacking snack.
After pre-baking your sweet potatoes, mash or puree them with a blender or food processor. Spread out your mashed sweet potato onto your dehydrator tray in a thin layer. Feel free to add extra sweetener or seasoning.
Dehydrate your fruit leathers at 135°F (58°C) until uniformly colored, dry and leathery. This will take approximately 6–8 hours.

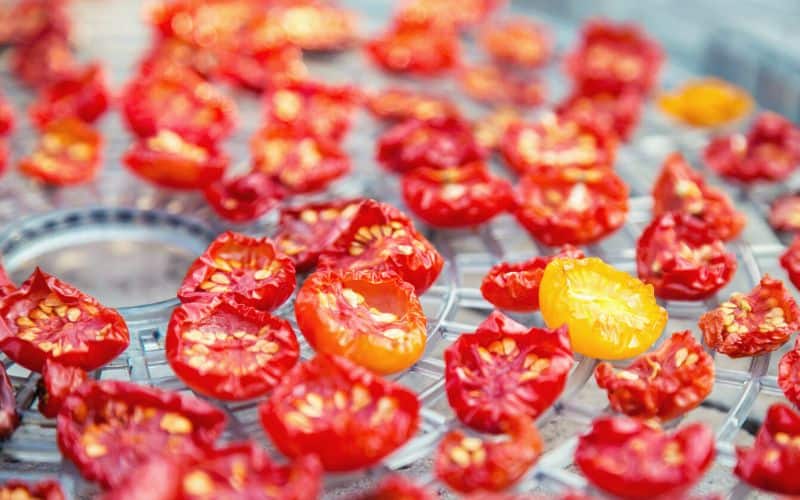
8. Tomatoes
If you’re a fan of sundried tomatoes, why not try dehydrating tomatoes at home? Dehydrated tomatoes are incredibly beginner-friendly and easy to make with either a dehydrator or oven.
Any tomato can be dried, from small cherry tomatoes to big harlem ones. If you’re using a small variety, start by cutting them in half. Bigger tomatoes will need to be cut up into slices no thicker than ¼ inch.
If you’re using a dehydrator, line your trays with parchment paper and line up your tomatoes skin down, cut side up – this will prevent them from sticking. Dehydrate at 125ºF (52ºC) for roughly 8–12 hours until the tomatoes are completely dry.
If you’re using an oven to dehydrate tomatoes, you’ll want to set it to the lowest setting possible and crack the door open slightly. Flip the pieces every couple of hours and remove them when they become dry and leathery.
When stored in airtight containers, dried tomatoes can last up to a year.
9. Cauliflower
Due to its obvious bulk and weight, cauliflower isn’t a veggie you normally find on the trail or mountain. Dehydrating cauliflower, however, allows you to bring this nutrient-packed vegetable along on all your adventures.
Start by cleaning your cauliflower and cutting it into equal-size florets to ensure a uniform drying time. Blanch the cauliflower for at least three minutes in boiling water.
Add your cauliflower to your trays. You’ll need to make sure you sort the pieces by size to ensure they all dry at the same rate. Dehydrate at 125°C (52°C) for 8 to 12 hours.
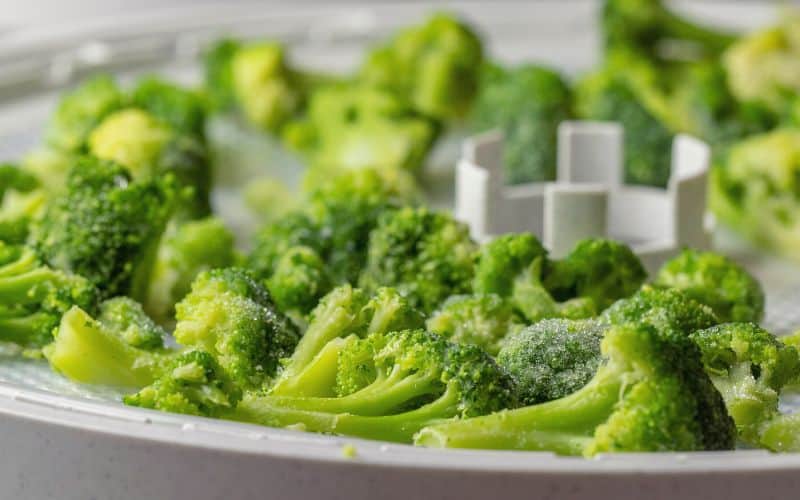
10. Broccoli
Like cauliflower, broccoli rarely makes it on backpacking or camping trips due to its bulk and weight. By dehydrating it, you’re conserving all of the broccoli’s nutrients while reducing its size and weight considerably.
Start by cleaning your broccoli and cutting it into uniform-sized florets. Blanch the florets in boiling water for at least 3 minutes. Arrange the blanched florets in an oven or dehydrator tray being careful not to overlap them. Dry at 140°C (60°C) in an oven or dehydrator for 8–12 hours.
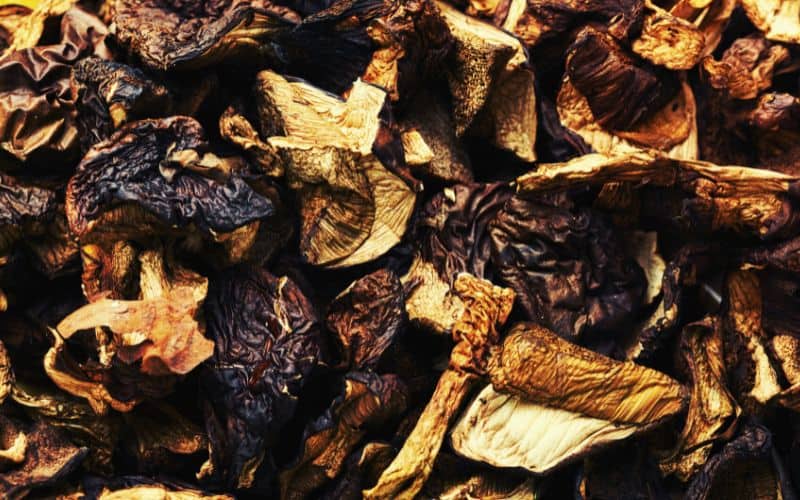
11. Mushrooms
Dehydrated mushrooms are incredibly versatile and easy to make. After rehydrating them, they can be added to all sorts of backcountry meals like stocks, vegetable soup, pasta, or eggs.
Begin by using a damp kitchen towel to gently clean any dirt or grit off your mushrooms. You want to make sure you use fresh mushrooms or they might start to smell a bit “off” in your dehydrator. Dice your mushrooms or cut them into ¼ inch slices.
Line your dehydrator trays with your mushrooms and dehydrate at 125ºF (52ºC) for 3–8 hours. When completely dry, they should be brittle. If they bend, they are not ready!
12. Cabbage
Bring along some dehydrated cabbage on your next adventures and you can add it to soups, coleslaw, stir frys, and more! Cabbage is high in Vitamin C, Vitamin K, and fiber. It will add plenty of nutrients and color to all your backcountry meals.
To get started, you should consider blanching your cabbage. Although it’s not necessary, it will stop the enzymatic process that makes foods degrade faster. If you choose to do so, blanch your cabbage for two minutes and then dry.
Remove the outer leaves of your cabbage and cut into quarters. Cut the cabbage into thin strips, no more than ¼ inch wide.
Place your cabbage onto dehydrator trays. You can overlap them a bit since they will shrink during the drying process. Dry at 135°F (52°C) for 8–12 hours until they become crunchy.
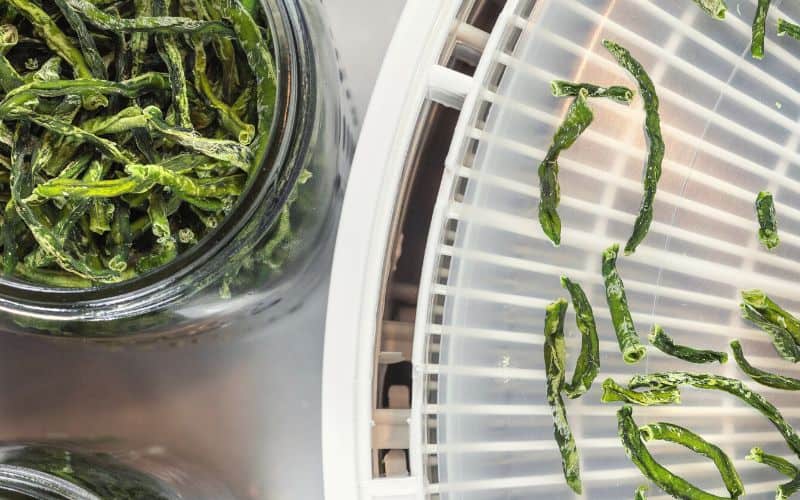
13. Green Beans
Dehydrated green beans are high in fiber, packed with nutrients, and satisfyingly crunchy. You can add some extra seasoning and eat them as a snack or add them to your backpacking or camping meals.
Blanch the beans in a pot of boiling water for several minutes. Drain the beans and pat them dry with a paper towel. In either a dehydrator or an oven, set the temperature to the lowest setting and dry for 8–12 hours.
Bon Appetit!
Looking for a lightweight, tasty, and shelf-stable snack for hiking, backpacking, or camping? Learn to dehydrate! Dehydrated fruits and veggies are nutritious, inexpensive, easy to prepare, and they won’t take up much room in your pack.
We hope this guide to the best vegetables to dehydrate has inspired you to get out there and bring along some dried vegetables on all your outdoor adventures.
If you’ve got your own tips and tricks for dehydrating, let us know in the comments below, and don’t forget to share this guide with all your outdoorsy friends!
Save for later!!! ⤵️