The first step towards a successful hammock camping trip in iffy weather is to ensure you have solid overhead protection from the elements. Achieving this step, however, takes a little bit of know-how and practice.
In this article, we dig into the process of setting up an overhead tarp and all the knots you will need to stay dry while you sleep on your future hammock-camping expeditions.
Table of Contents
Grab Your Supplies!
All you need to follow this manual is a willingness to practice some knots and the following bits and bobs of gear:
- Hammock
- A tarpaulin sheet
- Hammock straps
- Two carabiners
- 4 pegs
- 4 guylines
- 18-foot cord (at least 5mm thick)
- 3-foot length of cord
- Two trees
Set Up the Ridgeline for Hammock Camping: Step-by-Step Instructions
You might be thinking, “I want to learn how to set up a shelter, not whatever a ridgeline is!” Low and behold, ridgelines are an essential piece of this puzzle.

Here’s how to make one in four easy steps:
Step 1: Make a Prusik Hitch
Use the 3-foot length of cord to make a Prusik hitch using a Double Fisherman’s Knot. Doing so will give you a good base to start your ridgeline. If you don’t know how to tie any of these knots, use a comprehensive guide to hammock knots and be sure to get plenty of practice at home before you leave.
Step 2: “Pitch” Your Hammock
This step is optional at this stage. If the wind is strong, there is rain, or you are pitching up in any other kind of poor weather, skip this step for now, and get your tarp up to provide a little shelter for you and your gear, just as you would with a rainfly when camping in a tent.
If you do decide to move forward with this step, find two trees and extend your hammock straps between them, hanging them about 6 feet from the ground. The best trees should be at least 6 inches in diameter. Anything less and they will not be thick enough to support you. You could even do lasting damage to their continued growth.
Step 3: Anchor One End of Your Ridgeline
Start by tying an overhand knot on one side of the tarp cord. Refer to the knot guide if you need practice with this knot.
Follow this up by wrapping the cord around the tree about one foot above the hammock straps, which should be 5-6 feet from the ground. Keep in mind that the closer the lines are to each other, the better coverage you’ll get but less headroom, too.
String the unknotted end of the cord through the loop you created with the knot and pull it tight. Make sure to maintain tension on the knot as you walk the rest of the strap to the other tree.
Step 4: Anchor the Second End of Your Ridgeline.
Wrap the tarp strap around the tree just like you did previously, in the same direction and at the same height from the ground as the other side.
The standing end of the cord is the one attached to the tree and the working end is unattached. Tie the Prusik hitch to the working end of the line.
Once you have the Prusik hitch connected, clip a carabiner onto the standing end and then clip the Prusik’s loop into the same carabiner. Pull on the working end while repeatedly shifting the Prusik hitch towards the tree until the cord is tight.
And there you have it! A ridgeline for your tarp extending over your camping hammock, or where it will be soon.
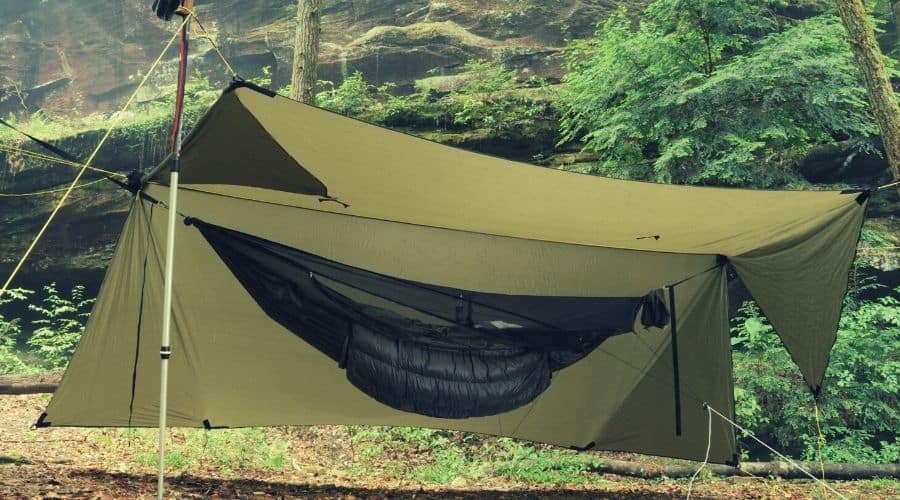
The A-Frame Configuration for Hammock Tarp Setup: Step-By-Step Instructions
There are two great ways to set up a tarp. A tarp for hammocks can be secured in an A-shape (aka an “A-frame”) over the top of your hammock.

You can also set it up using a diamond method, which is detailed below this one.
Step 1: Position Your Shelter
To position your tarp over the ridgeline, throw it over and let it hang down so there are equal parts on either side of the “ridge”.
Step 2: Attach the Guylines
Once it is even, attach your guylines at the two corner points of the tarp. Some tarps will have grommet holes you can tie a slip knot or basic hitch through. Others require a slip knot and stopper knot combination done by bunching up the material and tying it around the tarp to create an effective hold before pegging out.
Step 3: Tie on the Pegs
Once the knots are secured, you can use pegs at the other end of the guy line, joining them up using a clove hitch.
Step 4: Adjust to Get an “A”
Once the pegs are attached at the end, peg them out loosely. Then, gradually and evenly take in the slack so it is symmetrically positioned over the hammock, forming an “A” over the top.
The Diamond Configuration: Step-By-Step Instructions
For the diamond suspension configuration, you need a square-shaped tarp turned sideways to form the “diamond”.
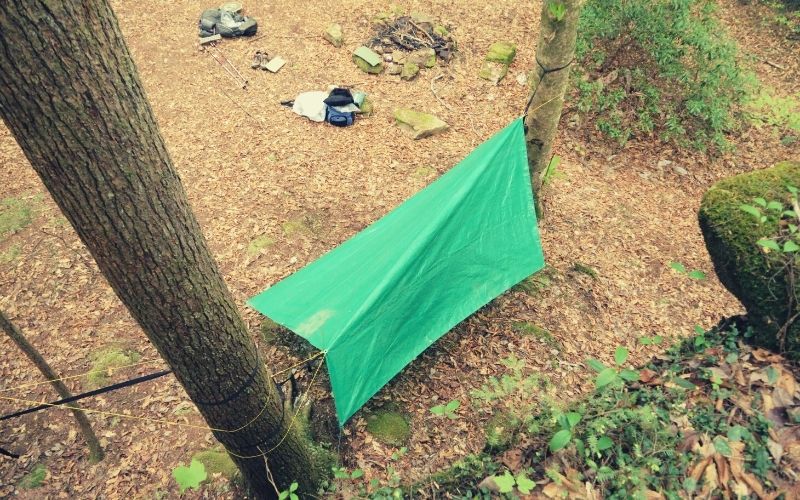
Step 1: Position the Tarp
Start like you would if using the A-frame configuration, positioning the tarp over the ridgeline. Instead of positioning the sides lengthwise across the line, the two corners should hang down forming equal triangles.
Step 2: Attach the Guy lines and Peg the Corners of Tarp
Peg the corners of the tarp in the same manner as when constructing up the A-frame style, using the video above to help you create a clove hitch.
Step 3: Adjust the Tightness
Ping your pegs into the ground and tighten it on either side to keep the tarp tight.
RELATED: Best Hammock for Camping & Backpacking
Sleep Well Under the Stars!
There is almost nothing better on a camping trip than getting a great night’s sleep after a long day on the trail. We hope that you have learned everything you want to know and more about setting up a proper shelter that will keep you dry while catching your Zs!
How did you like our article on constructing a waterproof hammock tarp setup? If you did or have anything to share about one of your recent adventures, let us know in the comments below!
