These days, outdoor clothing manufacturers tend to litter their product descriptions with all kinds of kooky terminology and acronyms as though every would-be buyer had a Ph.D. in textile technologies and a team of Nobel Prize-winning scientists on speed dial. One such term is DWR, which in recent years has become something of an ever-present in the specs and selling points of everything from our shoes to the outer shells of rain jackets & hiking rain pants.
But just what is a DWR coating? What does DWR mean? Is DWR waterproof vs water resistant? And, whatever it is, do we need it?
In this article, we’ll answer the above questions and provide further insights into the workings and usefulness of DWR, why you need it, how it’s gauged, and how to care for garments with a DWR finish.
NOTE: PhDs and teams of Nobel Prize winners not required for further reading.
Table of Contents
DWR (Durable Water Repellency): What’s It All About?
The acronym DWR stands for Durable Water Repellent, and refers to a coating applied to a product during production to add water resistance. Usually used in conjunction with waterproof breathable membranes such as Gore-Tex or an eVent layer on the interior, a DWR finish is intended to prevent the exterior of any product becoming saturated and thus impeding the garment’s overall breathability and water resistance.
A Very Short History of DWR
DWR finishes or coatings are not a new idea and find an early ancestor in the grease from animal fats and oils (such as linseed) used by early explorers, fishermen, and tribes such as the Inuits to coat tents, sails, and clothing.
Modern chemical-based DWRs were first used shortly after the introduction of GoreTex in 1969 when it was discovered that the waterproof lining in any three or two-layer garment would perform better if used in conjunction with an exterior coating that prevented the outer layer from becoming saturated with water.
How Do DWRs Work?
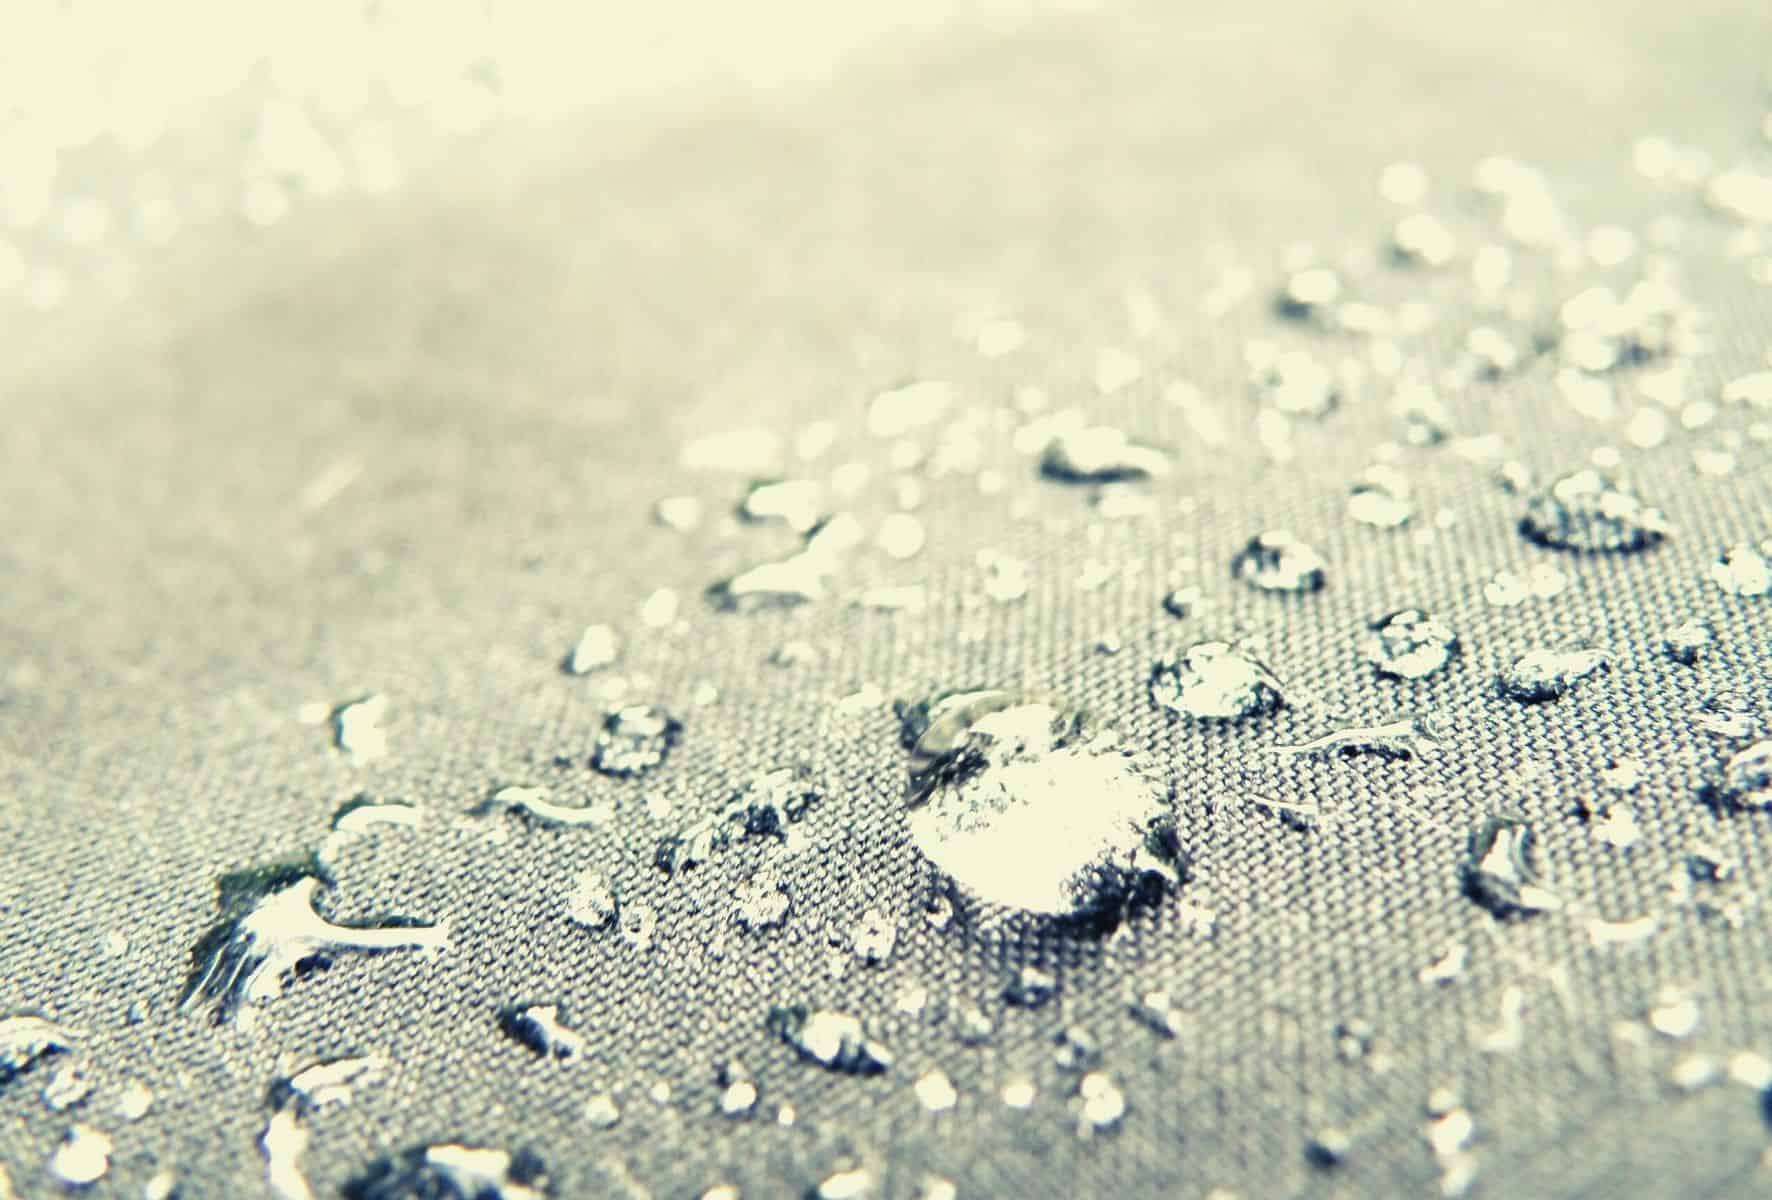
So what does water repellent mean and how does DWR protect you from the elements? DWR fabric works by allowing the material to which they are applied to shed liquid instead of soaking it up upon contact. To the naked eye, this effect is seen as water droplets beading up and rolling off the surface of the material.
At a more detailed, microscopic level, this process is far more complex and depends upon the angle of contact between moisture and the DWR textile. In layman’s terms, a DWR coating increases the contact angle between the fabric’s surface and moisture, and the higher the angle of contact the better: low contact angles result in the droplet spreading out on the surface and soaking into the fabric, whereas with a higher angle of contact, the water forms into a round bead or droplet and rolls off.
DWR Ratings
The DWR rating of any product is evaluated using a simple spray test. Water is sprayed onto the fabric and then the degree or level or water repellency is assessed visually by gauging the quantity of standing water remaining on the fabric’s surface. Ratings or scores are generated in points determined by the percentage of fabric with no water sticking to it. For example, a product with a 90 point rating means 90% of the fabric had no water sticking to it after spraying.
In order to test durability, the same test is repeated after various numbers of washes, which is indicated in the second number given in any rating. For example, a rating of 80/20 shows that the fabric retained an 80-point rating after 20 washes, or it was 80% water-free in the spray test following 20 washes.
What DWR Rating do I Need?
Differing from hydrostatic head, DWR ratings, if given at all, are usually contained in the small print of a product’s specifications. Below is a rough guide to deciphering any ratings you should happen to come across:
- 80 points/10 washes – The bare minimum for classification as DWR in most outerwear
- 80 points/20 washes – The typical DWR rating for water-resistant products for most outdoor industry brands
- 80 points/50+ – Exceptional water repellency, usually used in either very high-end waterproof products or garments which lack a waterproof membrane and rely only on DWR for water resistance.
Issues with DWRs
Those buying DWR products should be aware that are not without their drawbacks, most notably the use of chemicals, maintenance issues, and the need for reapplication of the DWR coating.
Chemicals
Although in recent years many brands committed to eliminating or reducing the use of harmful chemicals from their garments, a study published as recently as 2015 found 36 out of 40 outdoor products to contain toxic perfluorinated compounds (PFCs).
PFCs, which have been linked to health issues such as reproductive and developmental problems and cancer, are chemicals used in many DWR finishes that do not degrade, are very slow to eliminate from humans and other animals, and in many cases last indefinitely in the environment.
In 2015, 200 scientists signed the Madrid Statement, which highlighted the harmful effects of PFCs and called for the toxins to be phased out. Although some big brands were quick to comply, others such as the North Face and Mammut still use PFCs in newly released products, despite having vowed to phase them out of usage by 2020.
Maintenance & Reapplication
Unlike waterproof membranes such as Gore-Tex, eVent, or Pertex Shield+, the water resistant component in DWR products are durable, not indefinite. After prolonged usage and washing, a number of factors such as dirt, grease, sweat, abrasion, and weather exposure can and will reduce DWR efficiency and effectiveness.
To reduce the deterioration of a DWR coating, regular washing with additive-free a DWR detergent is advisable. After every 10-20 washes, reapplying the coating with a spray-on treatment such as Revivex or Nikwax TX Direct Spray-On (see video below) or wash-in treatment such as Nikwax TX Direct Wash-In will restore the coating’s effectiveness to levels similar to those at the time of purchase.
