
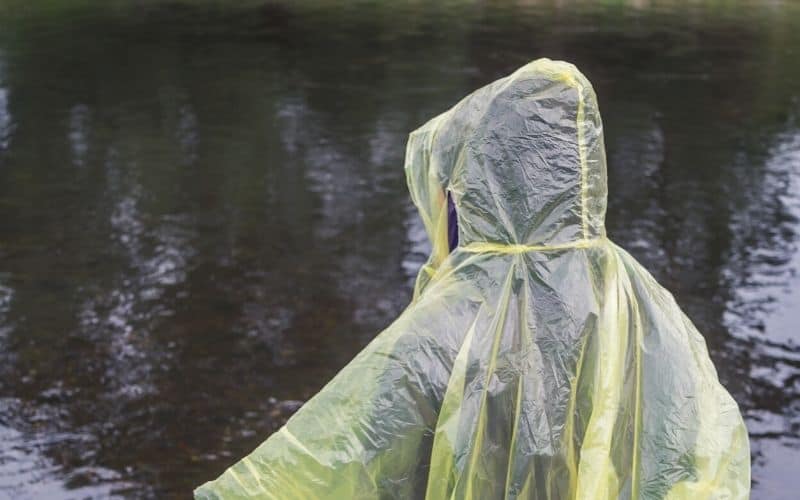
There are few things as satisfying as crafting your own, bespoke hiking gear. And while hiking boots, rain jackets, crampons, and most other gear items might be beyond the skill set of most of us, there are a few pieces of kit that almost anyone with a few hours to spare can easily throw together with ease. One of the most obvious is the rain poncho.
Rain ponchos make a great alternative to rain jackets, whether you’re out hiking or bouncing around town. They’re lightweight, comfortable, and offer more coverage. Best of all, they cost a fraction of what you can expect to pay for even a low-cost shell. If you make your own, moreover, it won’t set you back much more than a 6-pack of beer.
Below, our simple, step-by-step guide will have you conjuring up your own homemade rain poncho in no time.
Table of Contents
1. Gather your materials
The options material-wise for a DIY rain poncho are fairly extensive, but as long as the material is waterproof, lightweight, and tough enough to deal with a bit of backcountry rough and tumble, it’s a winner.

Below, we run you through the merits and drawbacks of some of the more common choices:
- Heavy-duty trash bag: cheap, water-proof, lightweight, but maybe a little too fragile and prone to rips and tears
- Old shower curtain: free (kinda), waterproof, relatively lightweight, and tough enough to deal with collisions with branches, rocks, etc.
- Purpose-bought vinyl or tarpaulin: waterproof, can be cut to size in the store to save you work, tough fabric, but kinda defeats the purpose of a DIY job and lacks the ethical appeal of repurposing
The verdict? That old shower curtain’s a shoo-in for the job…!
2. Cut your material to size
Get out your measuring tape and cut your material so it measures roughly 50-60 inches wide (60-65 if you want your poncho to cover your backpack too) by 60-70 inches long, depending on how tall you are and how low you want the material to hang on your legs.

3. Make a head-hole
Use your measuring tape to find the exact center of your material. If this proves to be tricky, fold the material twice and note or mark the point of the fold.
At this point, use a marker pen to draw a line measuring 12 inches long parallel to the bottom of the material in the middle of the sheet. Take your time to get this right because any mistake would render the whole operation a failure!
Now, cut along the line to make your head-hole. If the head-hole is a little tight, simply draw and then cut an arced line between the two endpoints on your original line to expand it.
4. Make your hood
Take the extra material from when you trimmed your poncho body and fold it in half. Draw a hood shape (as viewed side-on) on the material, making sure to leave the fold uncut. If you’re unsure what shape your hood should take, grab a hoody from your cupboard, fold the hood in half lengthwise, and trace around the edges onto your material.
Cut out your hood shape and sew a seam down the length of the back curve, which will help to make the hood more streamlined.
5. Attach your hood to the poncho body
Cut a 2-inch slit in the center of one side of the head hole on your poncho body. Fold the flaps back on the inside of the material and fasten them in place with a few stitches to make a more comfortable and spacious opening for your neck.
Next, use sewing pins to fasten the hood around the head hole on the opposite side from the folds made in step 4. Take your time and try the poncho on to make sure the hood is positioned correctly before moving to your sewing machine or getting out your needle and thread and sewing the hood in place. Use large, wide stitches to avoid compromising the strength of the material.

To make your hood adjustable, poke small holes all around the brim at 2/3-inch intervals, thread an old shoelace through the holes, and—hey presto!—you have an adjustable hood that can be cinched down when the wind picks up.
How to Make a Rain Poncho: Good to Go!
Didn’t we tell you making your own rain poncho was easy? By following the above steps, you’ll have your own, custom-made poncho in just a few hours and be ready to rock it on the trails next time the wet stuff’s falling.
Alternatively, if you decide you’d rather purchase one, then check out our guide to the best hiking rain ponchos.
If you liked this post on how to make a rain poncho, give us a shout in the comments box below. And please feel free to share it with your friends!
