Love ‘em or hate ‘em, if you don’t have hammock straps, knots are an essential part of any hammocking adventure. Setting up a hammock for camping or relaxation requires a solid working knowledge of several different knots.
If tying knots to hang a hammock makes you a bit nervous, we’re here to help. Coming up, we’ll walk you through 9 essential knots, what they’re useful for, and how to tie them. That way, your next hammock camping trip can get off without a “hitch”.
Do
Don’t

Table of Contents
Which are the Best Knots for Hammock Hanging?
Below are 9 must-know knots and hitches to use when tying a hammock to a tree.
- Girth Hitch
- Overhand On A Bight
- Figure 8 On A Bight
- Clove Hitch Knot
- Bowline Knot
- Taut Line Hitch Knot
- Double Fisherman’s Knot
- Water Knot
- Square Knot
1. Girth Hitch
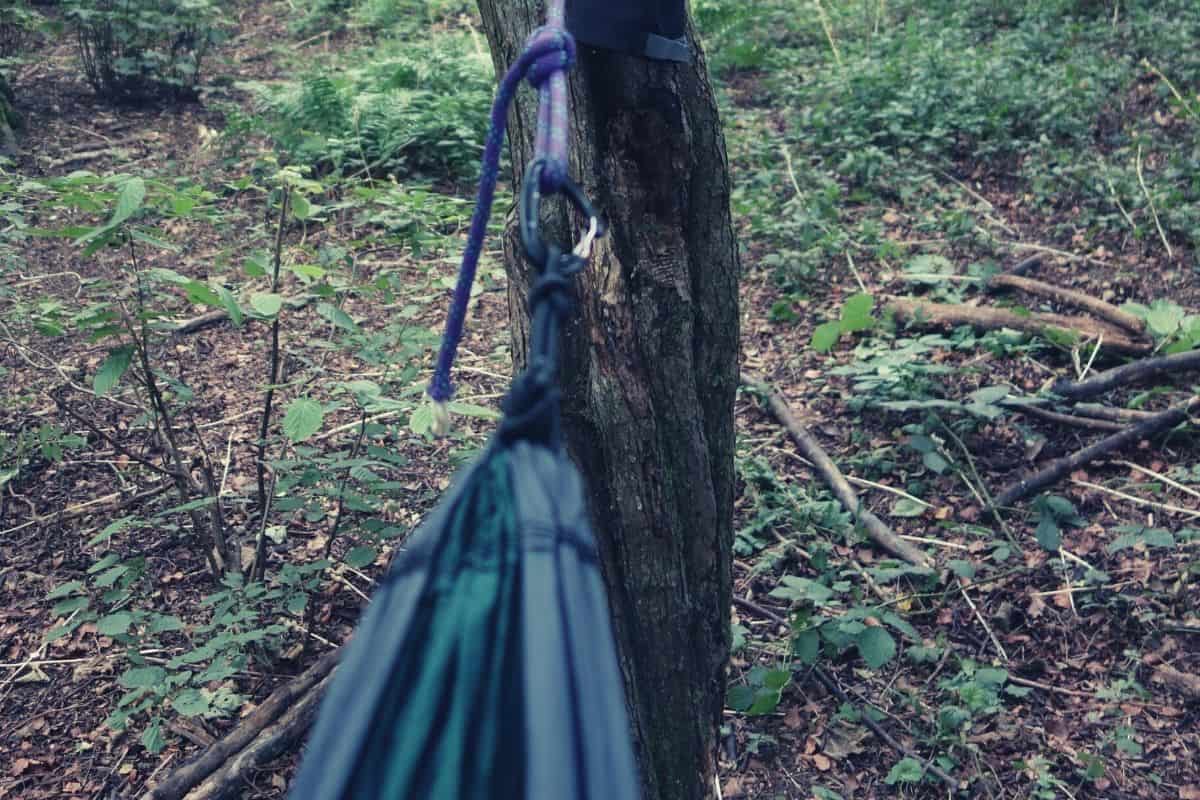
The Girth Hitch is a basic knot for looping a strap or rope around the tree that supports your hammock. It’s a fundamental knot that all hammockers should know.
It’s also very simple to untie, even after it’s been subject to heavy loads. The girth hitch is often used to attach hammocks and their straps to trees. Plus, you can also use it to attach a mosquito net to a ridgeline to keep bugs at bay while camping.
Here’s how to tie a Girth Hitch knot.
- Create a loop in the middle of your rope or strap. This is the working end of the rope.
- Hold the loop in your right hand and the standing end in your left hand.
- Pass the loop behind the tree.
- Take the standing end of the rope and pass it through the loop.
- Congrats, you have a girth hitch!
2. Overhand On A Bight
The overhand on a bight (overhand loop) is a great wrapped knot for creating an attachment point for carabiners and J-hooks. It’s also relatively easy to untie after being weighted, making it a versatile choice for hammocking.
Here’s how to tie an Overhand on a Bight knot.
- Create a bight out of a length of rope that’s about 12 to 14” from the standing end.
- While holding the bight in one hand, wrap the bight once around the standing end of the rope to make a loop.
- Thread the bight through the loop you created in step 2.
- Tighten the knot by holding the bight in one hand while pulling on each strand.
3. Figure 8 On A Bight
A fancier alternative to the overhand on a bight knot, the figure 8 on a bight is essentially the same knot but with an added twist in the rope.
The figure 8 and overhand on a bight serve the same purpose, though the figure 8 is easier to untie after being loaded. Thus, the figure 8 on a bight is a better choice for heavy load situations, like creating attachment points for hanging a hammock.
How to tie a Figure 8 on a Bight.
- Create a bight out of a length of rope that’s about 16 to 20” from the standing end.
- While holding the bight in one hand, wrap the bight twice around the standing end of the rope to make a loop with two twists.
- Thread the bight end through the loop you created in step 2.
- Tighten the knot by holding the bight in one hand while pulling on each strand with your other hand.
4. Clove Hitch Knot
The clove hitch is one of the best knots for hammocks, known for its ease of tying and versatility, making it suitable for various situations. It consists of two half-hitches, allowing you to secure it quickly.
You can use the clove hitch to anchor guylines on your hammock tarp or you can use it to create a ridgeline. Furthermore, clove hitches are a superb way to attach ropes to a carabiner. This is especially true if you think you’ll want to adjust the length or tautness of your rope somewhere down the line.
How to tie a Clove Hitch.
- Hold the leading end of your rope and wrap the rope around a carabiner, tree, or stake to create a single turn of the rope.
- Take the tail and pass it once again around your object to create a second turn.
- Thread the tail under itself to complete the hitch.
- Pull on both ends of the rope to tighten the hitch.
5. Bowline Knot
One of the most well-known knots, the bowline, is a fundamental knot used by sailors and climbers worldwide. With the bowline, you can secure a rope to an object, like a tree, or form a loop for attaching a carabiner.
How to tie a Bowline knot.
- Take the working end of the rope and use it to create a loop, leaving 10 to 12” of the tail end to work with.
- Pass the tail through the first loop that you made in step 1. This will make a second, smaller loop.
- Thread the tail through the loop you made in step 2.
- Pull each of the strands of the knot until they are tight.
6. Taut Line Hitch Knot
The taut line hitch, also known as a midshipman’s hitch or tent hitch, is an excellent method for tensioning guy lines. You can also utilize the taut line hitch to establish a tight ridgeline for your tarp.
How to tie a Taut Line Hitch.
- Wrap the working end around a tree or stake.
- Take the working and wrap it around the standing end two times, wrapping the rope upward toward the tree or stake.
- Pass the working end under the two wraps that you made in step 2 so that the tail is pointing away from the tree or stake.
- Wrap the tail once more around the standing end.
- Pass the rope back through the loop you created in step 4.
- Slide the hitch up or down the rope to tighten your guyline or ridgeline.
7. Double Fisherman’s Knot
The double fisherman’s knot is a dependable option for joining two lengths of rope. As a bend, the double fisherman’s knot is highly secure and unlikely to come undone. However, it can be challenging to untie after bearing a heavy load, such as a person’s weight.
How to tie a Double Fisherman’s knot.
- Hold the tails of both ropes that you’d like to tie together so that the ends overlap by around 16 to 18”.
- Take the tail of the rope on your right and wrap it twice around the standing end of the left-hand rope to create a double overhand stopper knot.
- Repeat this process using the rope on your left.
- Pull the end of each rope, one end at a time, to tighten the two knots.
8. Water Knot
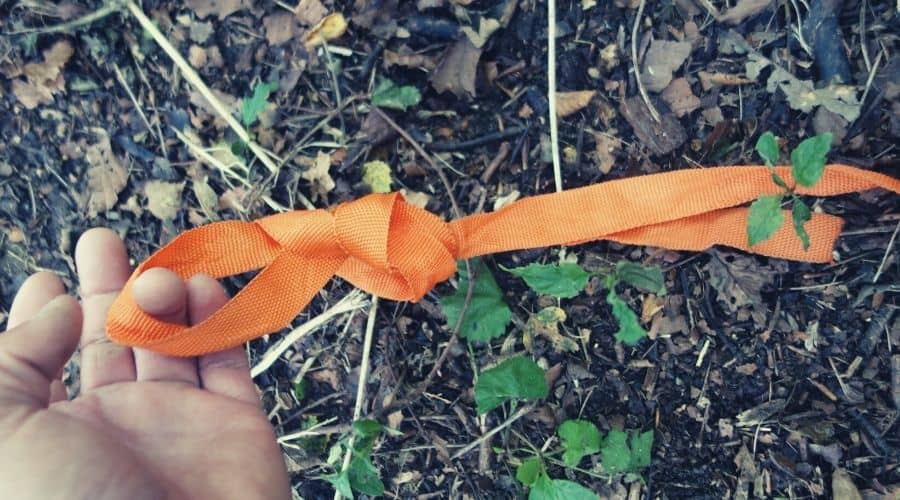
A more user-friendly alternative to the double fisherman’s knot, the water knot (technically a bend) is an excellent option for hammocking. It is especially well-suited for webbing rather than rope.
How to tie a water knot.
- Create an overhand knot in one of your pieces of webbing, leaving about 5 to 8 inches of tail.
- Trace the path of the overhand that you made in step 1 using the other piece of webbing. Make sure that you avoid twisting the webbing as you tie. Ideally, the webbing strands should be parallel to each other at all times.
- Pull all of the strands of webbing tight to finish the bend.
9. Square Knot
The square (or reef) knot, technically a bend, is a essential knot for any outdoor enthusiast. It is suitable for joining two pieces of line together for non-load-bearing purposes. For instance, you can use it to secure your hammock sleeping pad to your backpack each morning.
However, since it can easily come undone—even when tied correctly—we do not recommend using this technique in any load-bearing situation.
How to tie a Square knot.
- Cross one tail end of the rope over the other.
- Take the other tail end and cross it over the first tail end.
- Tighten both ends of rope to finish the bend. It’s as quick as that!
RELATED: No trees? No problem. Learn how to hang a hammock without trees
What different Types of Knots are there?
There are 3 different types of hammock knots that you ought to know.
- Knots: Anything that can be tied in rope or webbing without the need for other materials, like stakes or poles, to support their structure. Examples include the bowline, figure 8 and the reef knot.
- Hitches: Knots that need to be tied around another object, like a tree, carabiner, or stake. Examples include the half hitch and girth hitch.
- Bends: The result of tying 2 pieces of rope or webbing together. Can either be used to form a circle of webbing/rope or to tie 2 separate pieces of rope together. Examples include the sheet bend and the figure 8 bend.
What are some Hammock Knot Tying Terminology?
In the instructions above we used some knot terminology that you might not be familiar with, and we’ve provided some definitions in the list below.
- Bight: A curved or bent section of rope that forms a U-shape.
- Loop: Similar to a bight, but occurs when the two strands that form a bight cross at the bottom.
- Working End: The part of the rope, line, or webbing that you’re actively using to tie a knot.
- Standing End: The other part of a line that you’re not using for tying. Also called the free end or the lagging end.
- Tail: What’s left of the working end after you finish tying a knot. Also called excess rope. Sometimes used interchangeably to mean the standing line or end.
How to tie a hammock knot: The Verdict
Learning how to tie knots for hanging a hammock doesn’t have to be an insurmountable challenge. Now that you’ve learned all these great knots for hammock camping, all it takes is a little practice!
Let us know which one you found most useful in the comments below. Also, don’t forget to share this article with your friends so you can all practice tying knots. See you in the mountains!
