A trip to California offers plenty to see and do, but only one required destination – Yosemite National Park. It is the iconic vision of the American West, exceptional enough to garner unabashed affection from ol’ John Muir. For the spirited hiker, Yosemite is about as close to heaven as we’re going to get.
But rather than fight through throngs of people visiting Half Dome and the views of Horsetail Falls, get your feet a’movin’ and challenge yourself to Clouds Rest. This demanding route is off the beaten path and avoids tourists and hikers clogging up the trails.
Table of Contents
Trail Overview
Introduction
Video by u/velocd
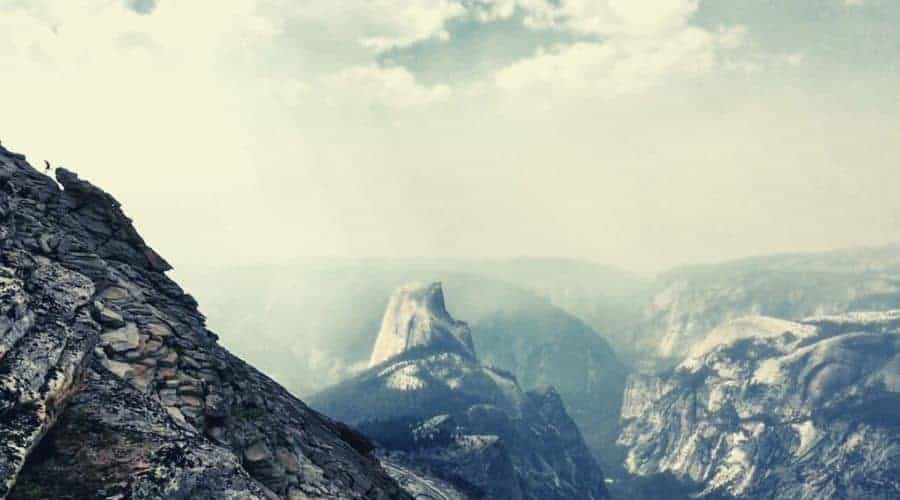
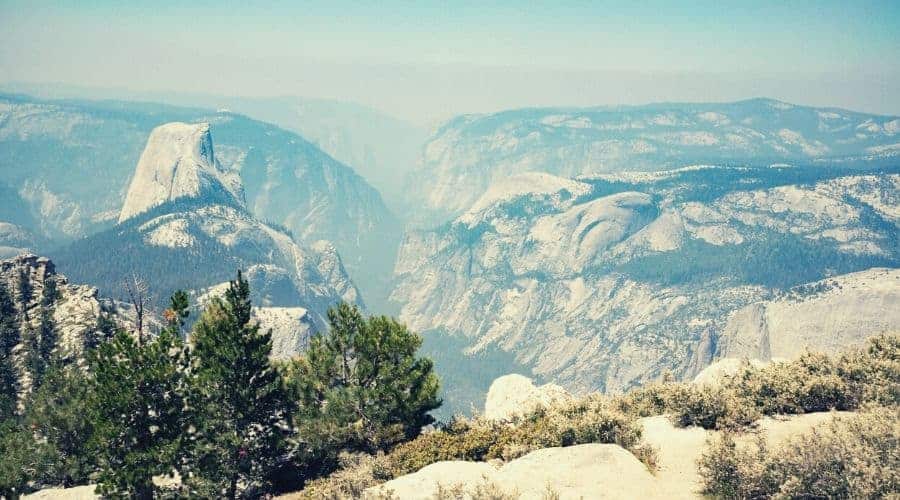
The trail offers up everything that makes for a good hike: switchbacks, rocky trails, and ridgelines to traverse, all complete with sweeping views of Half Dome and beyond.
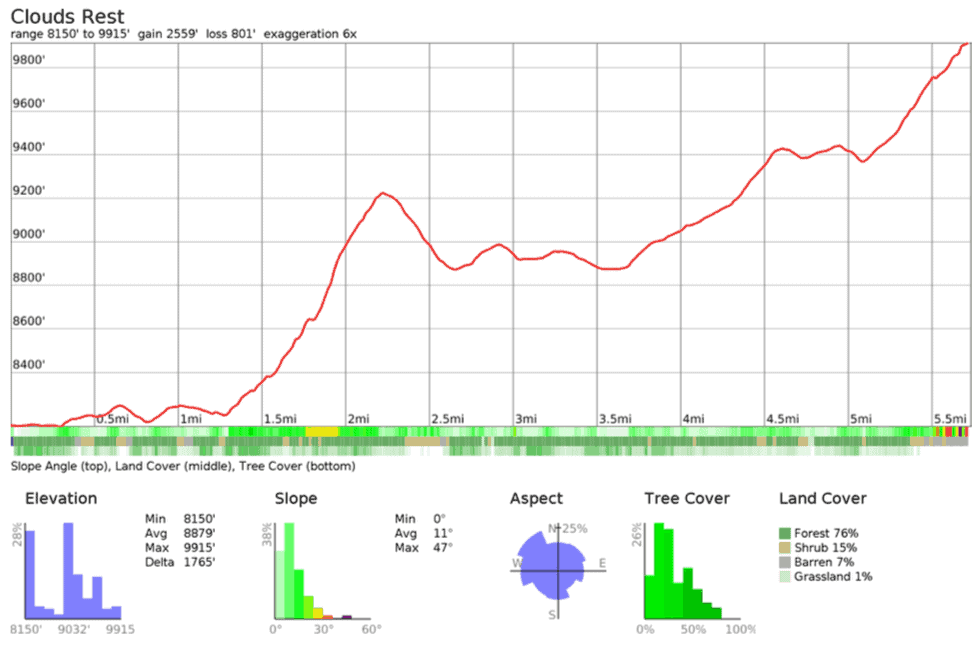
This hike is no joke. The most common route to the top is an out-and-back trail, 6 miles one way making for a 12-mile round trip total. Hikers enjoy (or suffer through) 1,775 feet of elevation gain in a location where the weather turns faster than a chihuahua chasing its tail.
Geology/Geography/History
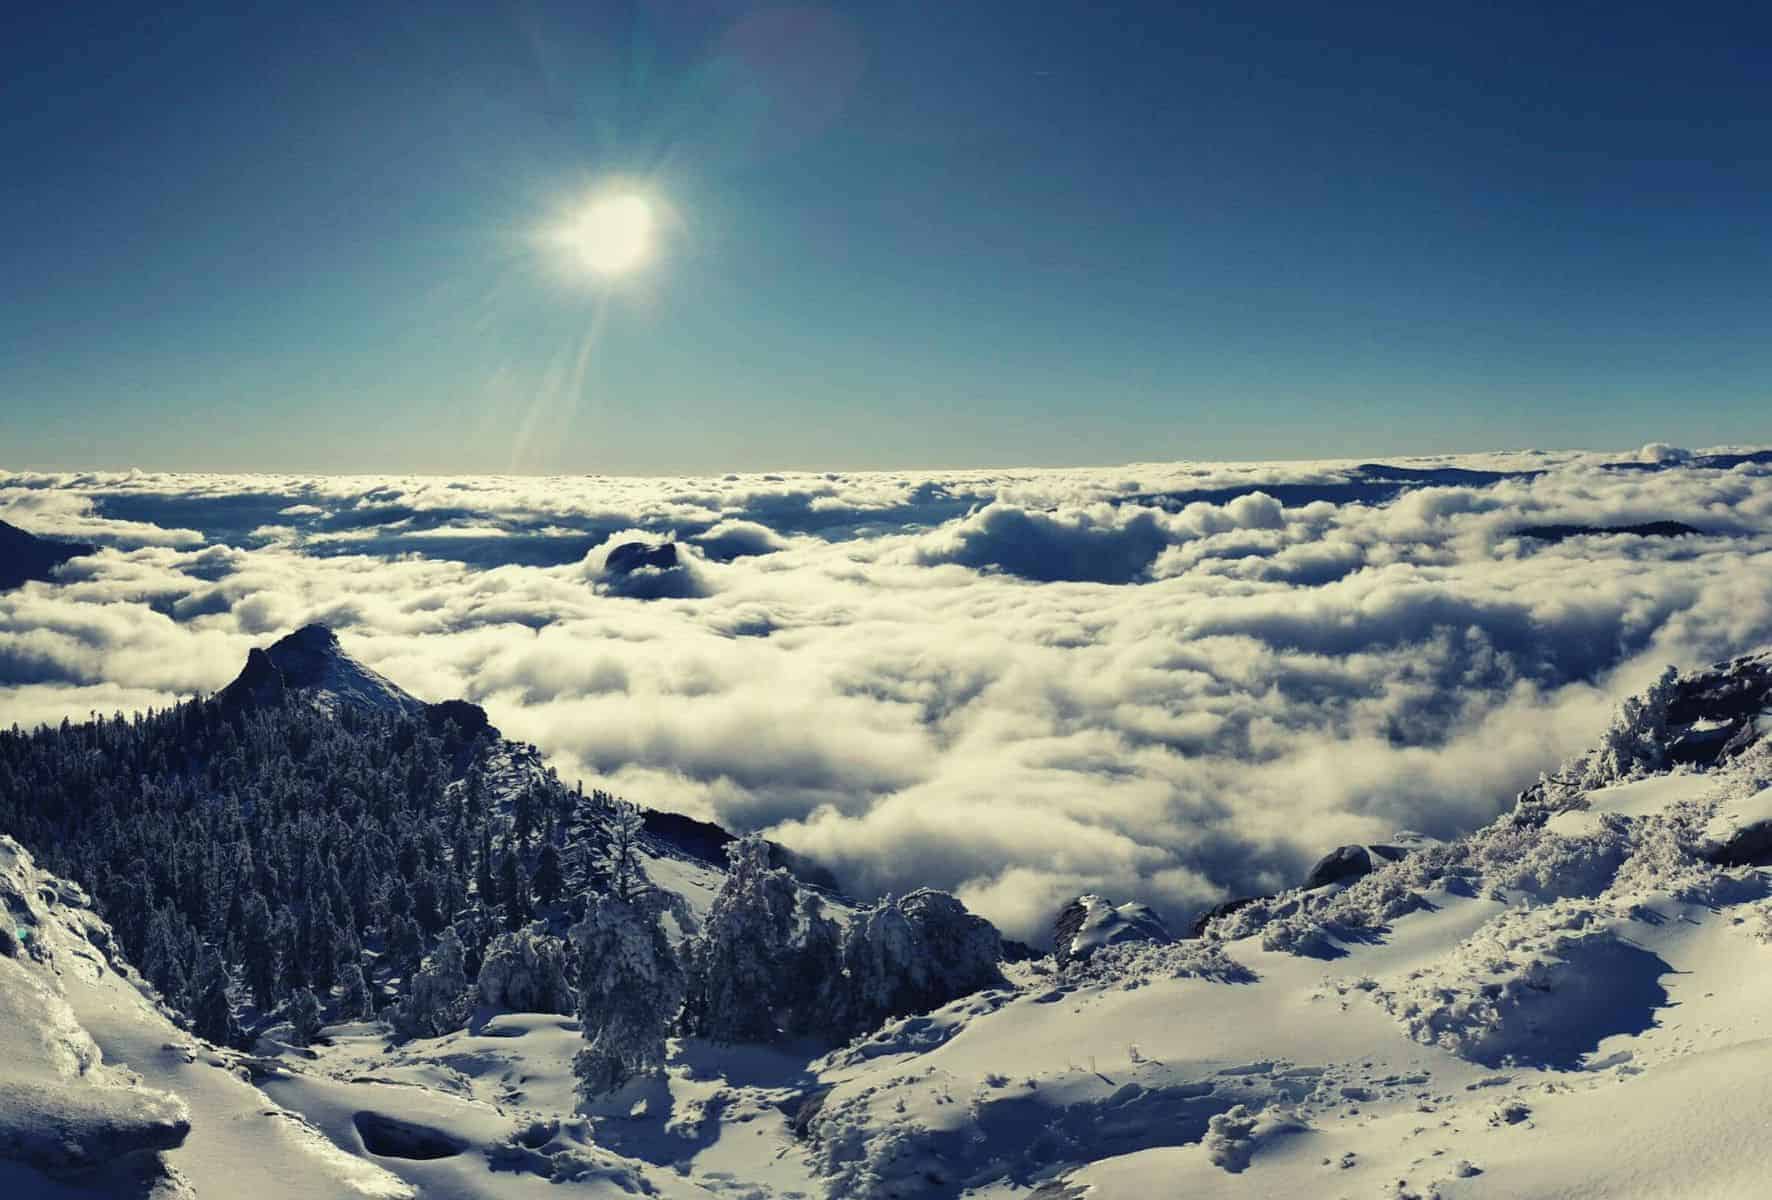
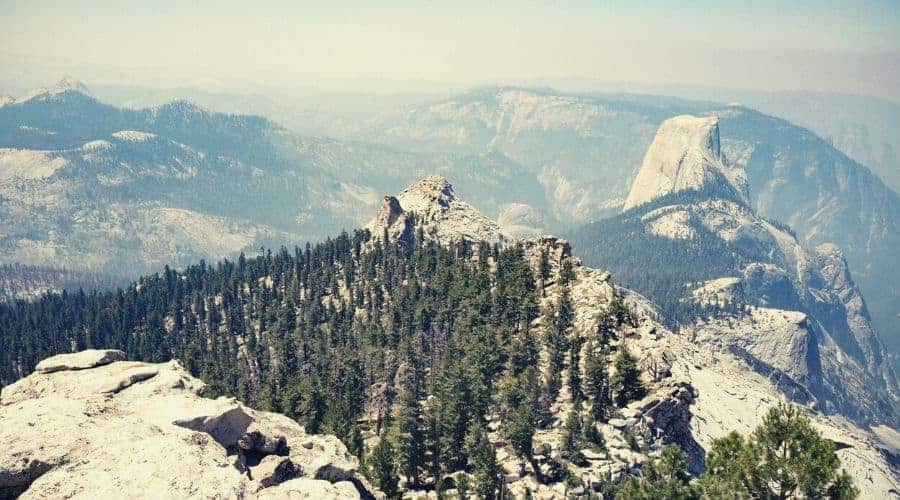
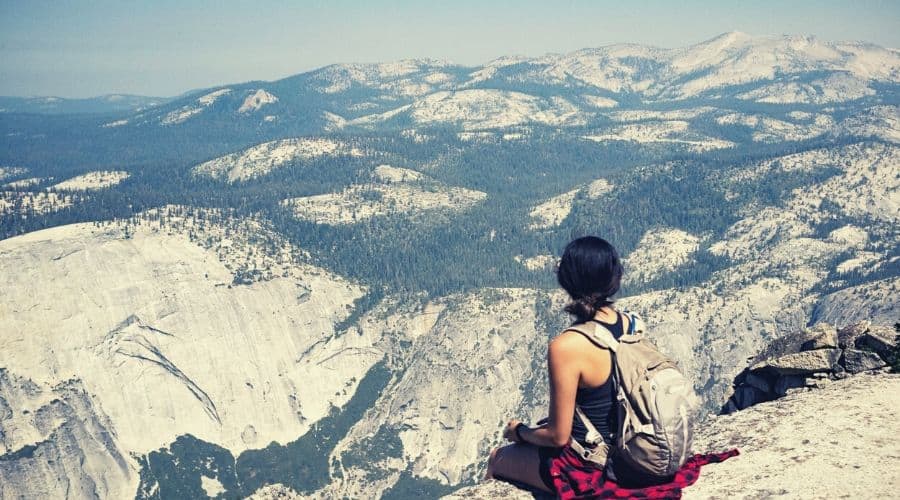
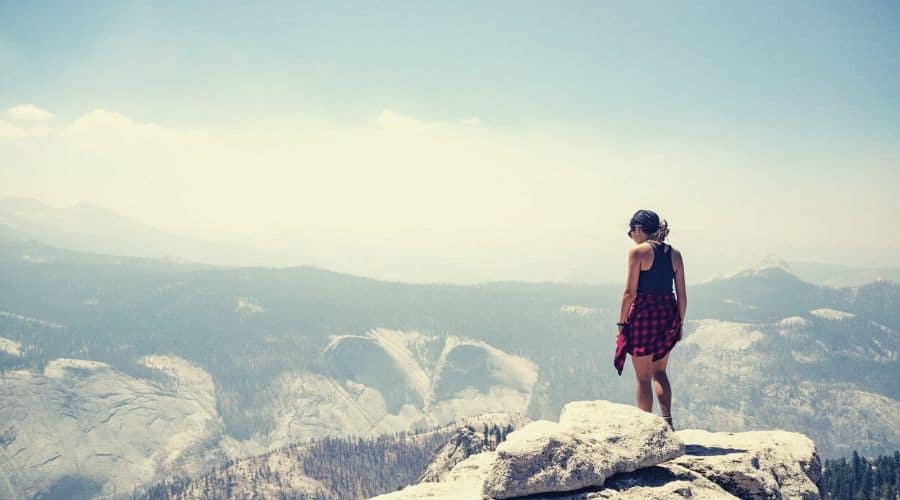
Like much of Yosemite, the peak is composed primarily of granite. Its hair-raising ridgeline is called an arête, a rock ridge separating two valleys typically formed by glaciers. From the peak, you can see an enormous 360° swath of Yosemite, with Half Dome standing prominently in the distance.
The mountain earned its name from the Mariposa Battalion, a mid-19th century California militia. The Battalion’s medical doctor Lafayette H. Bunnell claims the Battalion gave it that title because the clouds settled down and rested upon the peak.
The peak is south-centrally located in the park. It is east of Half Dome and south of Olmstead Point; while you’re in Yosemite, take a hike up Olmstead Point to get an incredible view of Clouds Rest.
Type of Trail
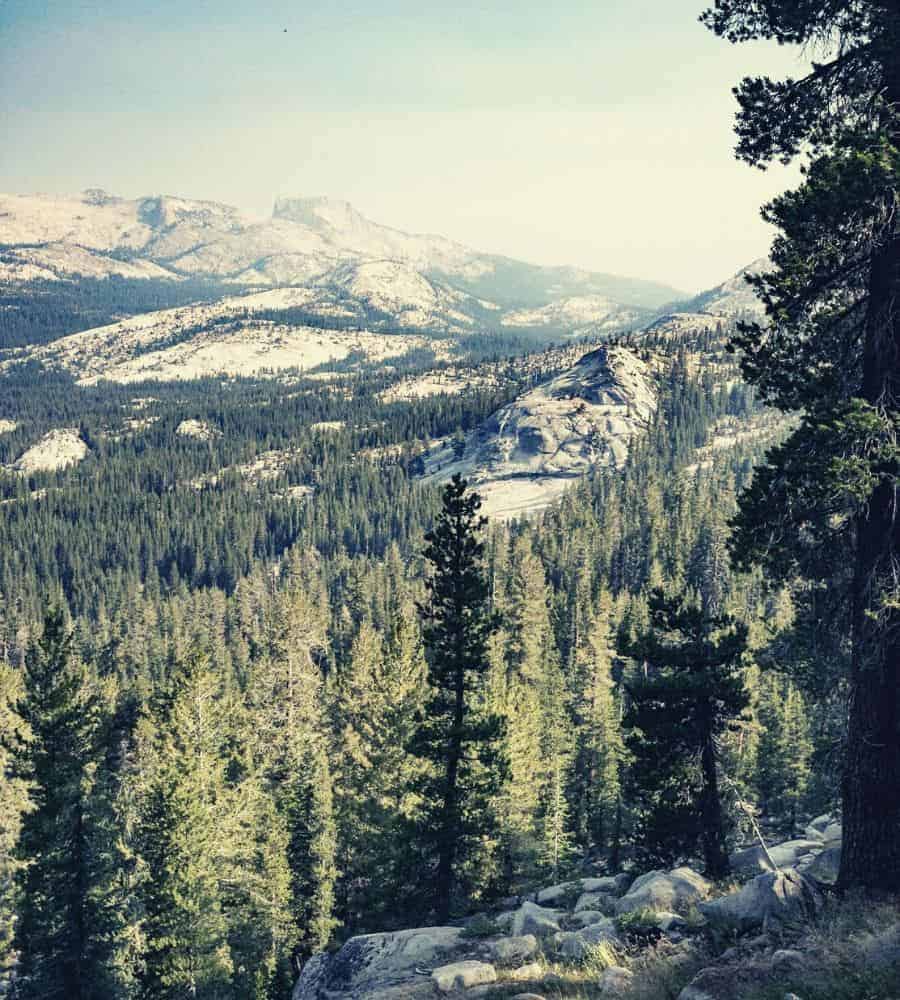
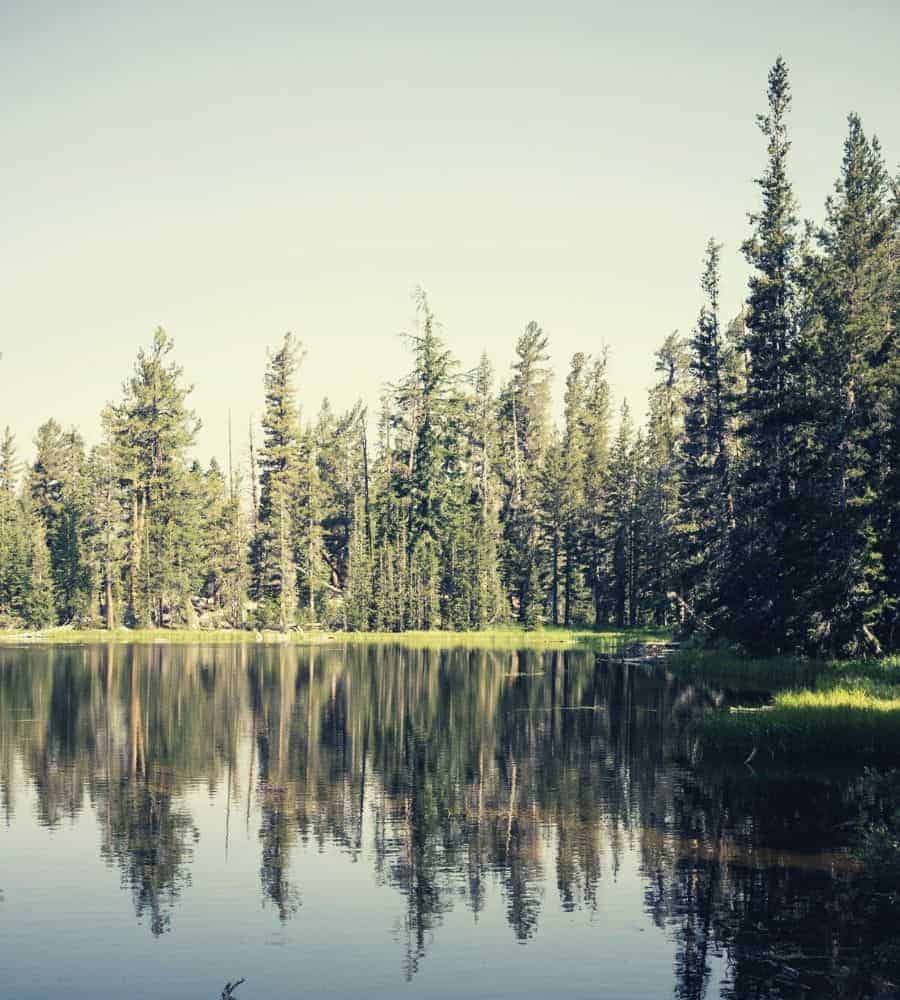
This is not a hike for folks looking for a leisurely stroll! The trails passes through meadows and forests, but expect to tackle very rocky, ankle-snapping sections of trail.
Early on in the hike, there are some watery obstacles. In late summer it’s easy to skip across the meager trickle of water, but during wet periods the water can be high enough (knee-high and higher) you’ll need to slosh through it.
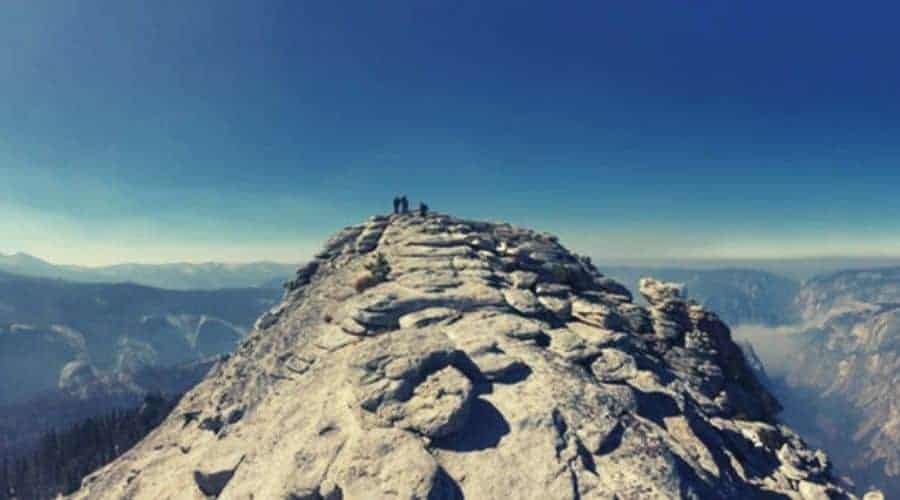
Near the peak, there is a vertigo-inducing section of trail that demands focus and caution. It is a razor-thin segment. Seriously, a fall off of this would result in a pile of broken bones and worse at the bottom. Pay attention to your footing and only hike in dry conditions to avoid a spill.
Difficulty Summary
Brace yourself for a seriously intense hike. By distance alone, it deters many from attempting Clouds Rest. What’s interesting is the elevation profile of this hike. The trailhead sits at 8,150 feet, and the peak scrapes the sky at 9,926 feet. The entire hike has an elevation change of about 1,775 feet.
Spread out over more than five miles, this isn’t so bad, right?
Well, brace yourself; a single mile of the hike eats up 1,000 feet of that elevation change. Holy smokes! That means this section of switchbacks is going to be a quad killer on the way back down.
Planning
When you’re heading into a place like Yosemite, you need to have a plan, even if it’s just for avoiding the worst of the crowds and traffic.
Best Time of Year
The hike is best done during the summer (typically June through October). The trailhead can be unreachable in the spring and winter, and the Tenaya Lake outlet becomes a far more significant obstacle when there’s a lot of snowmelt buffering up that water supply.
The drier conditions of the summer are the safest way to tackle this peak. A slippery ridgeline is a disaster waiting to happen, so keep your eyes peeled for approaching storm clouds. Turn back immediately if you see storms approaching because there’s little cover to protect yourself from the elements.
Most hikers start their journey with temperatures floating around 60-degree Fahrenheit and are caught off-guard when it’s 80 degrees or warmer by noon. Be mindful of the heat and use sun protection (see our Suggested Gear below).
Some hikers visit the peak during conditions when there is plenty of snow on the ground. This is not generally recommended for anybody except experienced hikers with more than a few miles under their belt.
Permits
Luckily permits are not required to day hike the trail, but any overnight trips require a backcountry permit. These can be exceptionally difficult to obtain, so plan your trip as far out as you can to ensure you receive one.
Most trails to tackle this hike take less than a day to tackle anyway. Hikers report that the hike takes between five to twelve hours to complete, based on fitness levels and the frequency/duration of breaks.
Camping
All camping in Yosemite requires permits purchased ahead of time. Obtaining these permits can be difficult and requires a lot of forethought before your trip. If you’re lucky enough to obtain a permit, there are several campsites available.
One is located off of the Forsyth Trail, a few miles from the summit and at the base of the Clouds Rest Trail leading to the peak only a few miles away. Another potential camping location is on the Clouds Rest Trail, a flat section located before the final ascent to the peak.
The Little Yosemite Valley backpackers campground is located to the west of Clouds Rest and offers a different approach to the peak (read about this below in Best Routes).
For people interested in camping outside of Yosemite, there are a couple of established campgrounds near the Tioga Pass entrance of the park (not far from the trailhead). Read our guide on dispersed camping for other ideas.
Trail Heads
The trailhead is off of Tioga Road near the west end of Tenaya Lake. Getting there requires the road to be open and accessible (hence summertime hiking); it’s about thirty miles to reach the trailhead from Crane Flat to the west, and about fifteen miles to reach the trailhead from Yosemite National Park’s eastern entrance at Tioga Pass.
Shuttles, Parking, Transportation
Look for a small parking lot near the trailhead that will likely be filled by mid-morning. If the lot is full, you can park on the side of the road in a safe location. Make sure you park safely and responsibly and always adhere to all parking signage!
Several shuttle options exist in Yosemite but, it can take some (you guessed it) proper planning to coordinate with the schedules. Most of the shuttles are located around the visitor’s center of the park.
This is a hike primarily accessible to hikers with access to personal vehicles to reach and park at the trailhead.
Clouds Rest Trail Options
The trailhead at Tioga Road is the most popular and well-used route to reach the peak of Clouds Rest, but there are other avenues to reach those lofty peaks. Most trails are well-marked.
Tioga Road/Tenaya Lake
Most folks opt for this trail because it is well-marked, is easily accessible, and offers the quintessential Clouds Rest experience. The nearby parking is a bonus. The hike clocks in at about 6.2 miles from the trailhead to peak.
Happy Isles
If you’re in the Half Dome area and have a backcountry permit, you can tackle this 20-mile beast. Follow the Half Dome trail until about two miles from the summit. At this point, you’ll spot signs for Clouds Rest trail. Expect 6000+ feet of elevation change on this one.
Good to Know
It only takes a little forewarning to prepare for the unexpected when climbing Clouds Rest.
It Gets Hot
Expect daytime temperatures to shoot close to 80-90 degrees Fahrenheit. Pace yourself accordingly and be mindful of weather forecasts. Getting heat sickness in the Californian wilderness while beyond cell phone reception can be disastrous.
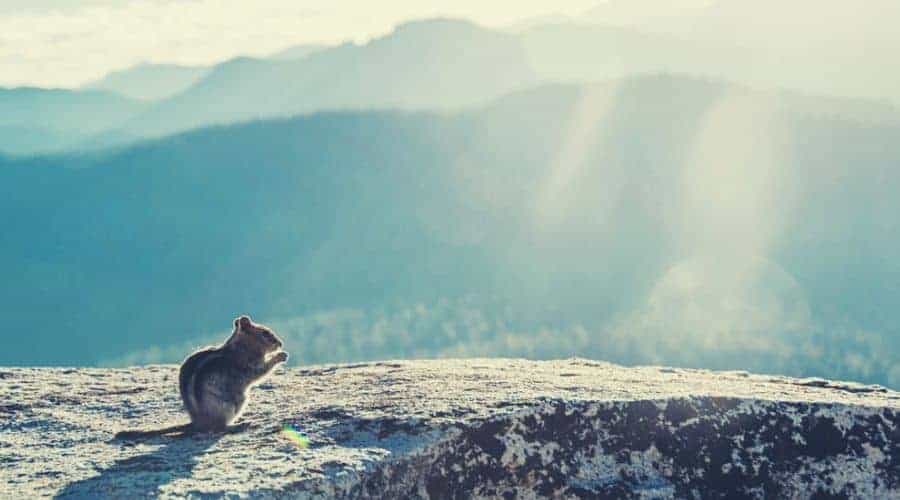
Bears!
This is the home of bears and mountain lions, among other animals. Be mindful of these creatures. Don’t leave food in your car at the parking lot or roadside unless you want a bear opening it up like a tin can to find that pack of cupcakes you forgot.
Sorry, Fido- No Dogs Allowed
Cue the sad trombone. Dogs aren’t permitted on the trail.
Suggested Gear List
We have a few items we think are extra important to bring with you to Clouds Rest.
Sun Protection
Much of the trail is in full sun and on a hot, scorching day, the heat pounding down on you takes a toll quickly. Sunscreen is essential to bring, and a good hat does wonders for keeping you cool. My favorite is a Tilley wide-brim hat. Not only is it highly functional, but it also looks pretty damn good too. Pair that sucker with a wet bandana around your neck, and it’ll feel cool and breezy.
Water
I know, you’ve probably got some water with you, but Clouds Rest is a demanding and exhausting event. We recommend at least four liters of water per person in your group. There aren’t opportunities to refill on this hike.
Sure Footing
A good pair of shoes or boots is absolutely necessary on this hike. It isn’t a bad idea to bring an extra pair of shoes for that first section near Tenaya Lake (I’d suggest Crocs or something lightweight and easy to carry). I wear the Helios by La Sportiva for all of my outdoor adventures; I like a light, flexible shoe that offers mobility, even if my feet would be sore from a steep descent.
Resources
At a minimum, you’re going to want to review a map, but to get the most from a hike up Clouds Rest you’ll want to use every resource you’ve got available.
Maps and Guidebooks
Finishing Up
Yosemite is a park with plenty to do, but some experiences stand out above the rest. Catching sight of Bridal Falls ranks up there with taking in all that El Capitan has to offer, but when it comes to feet-on-the-ground action and experiences, Clouds Rest takes the prize.
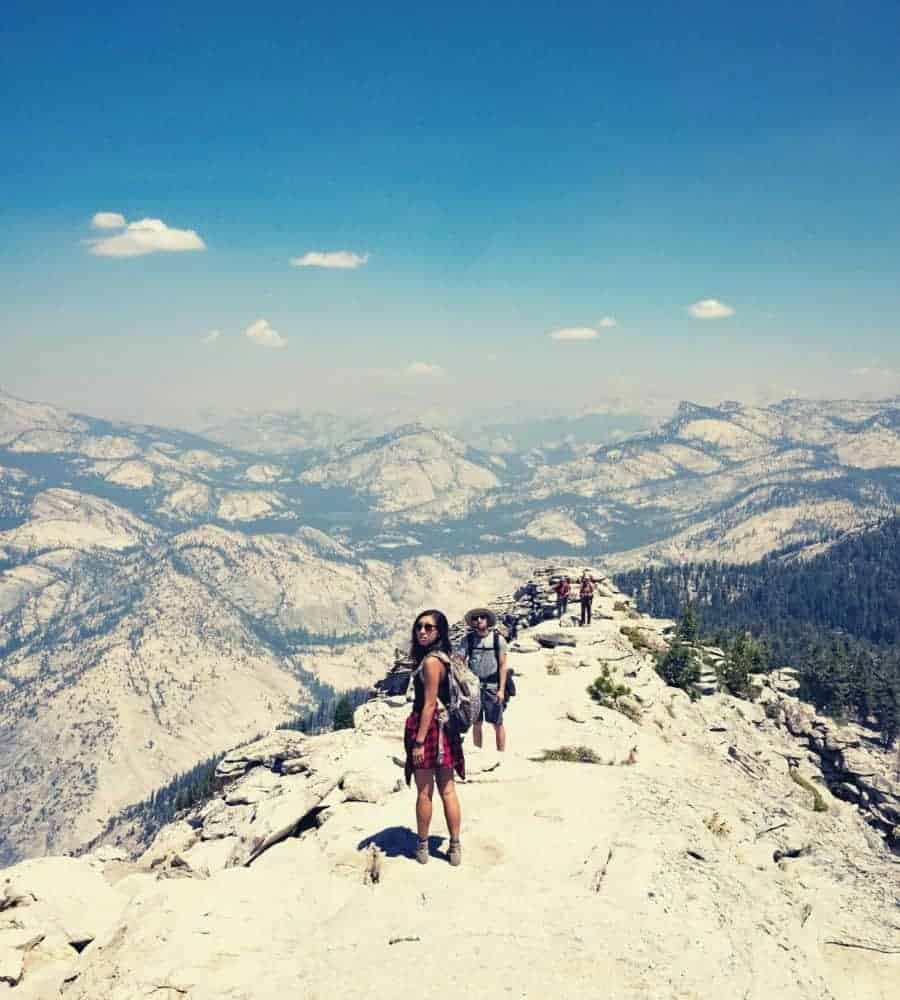
If you’re up to the physical challenge and able to time the trip appropriately, you’re going to have one hell of a time out there. Make sure to take pictures to show off that amazing 360-degree panorama, and let us know how the trip went.

The article says
“The Little Yosemite Valley backpackers campground is located to the west of Clouds Rest and offers a different approach to the peak (read about this below in Best Routes).”
Sadly, there is no section titled “Best Routes”.
Good info otherwise.
Thanks for pointing this out Max, I’ll need to go check the original word doc…maybe we forgot to upload that section!