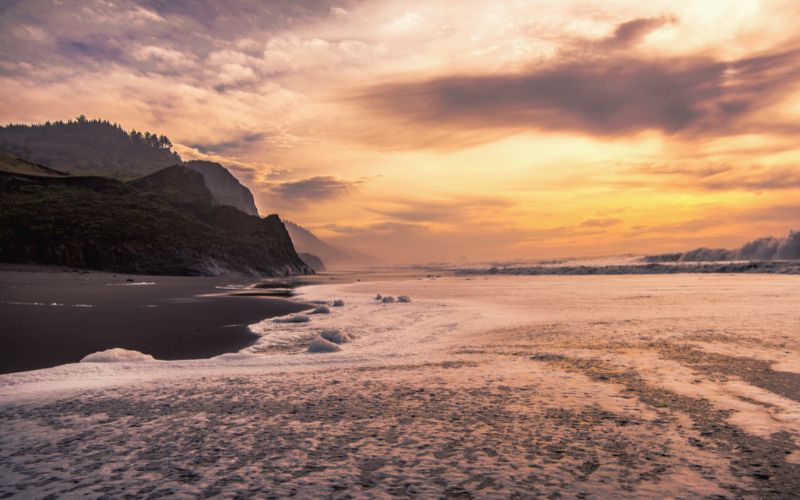
If you want your next backpacking adventure to be a coastal or California-based one then look no further than the Lost Coast Trail. This route will have you hiking along 25 miles of rugged coastal trail along a secluded and stunning stretch of California coastline.
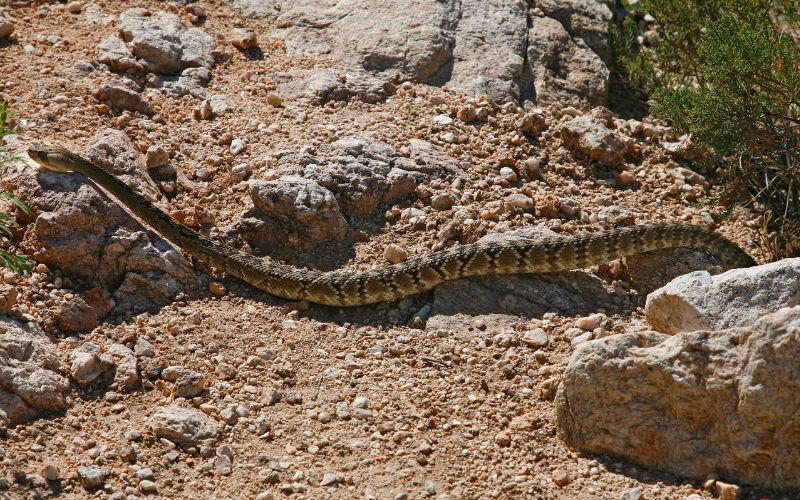
Located just a few hours north of San Francisco, this trail connects Mattole Beach to Black Sands Beach. It features miles of rocky beaches, serene creeks, and intriguing shipwrecks. Along the way, you’ll also encounter rugged cliffs extending into the Pacific Ocean, the possibility of spotting sea lions and shorebirds, and, if luck is on your side (from a safe distance, of course), a black bear or rattlesnake.
In this guide, we’ll kickstart your journey between Mattole Beach and Black Sands Beach with essential trip planning logistics to address before your departure. You’ll also find detailed stage-by-stage route descriptions, insights into potential hazards to remain vigilant about, and gear recommendations tailored to the specific terrain and climate of the Lost Coast Trail.
Do
Don’t

Table of Contents
What You Need to Know For Hiking The Lost Coast Trail?
Important questions to consider when planning your Lost Coast Trail backpacking itinerary are outlined in the list below.
- When to Go?
- How Long?
- What Permits Do You Need?
- How To Get There?
- Where To Camp?
1. When to Go?
The best time to hike the Lost Coast Trail is usually from late May to October. Since you’ll be along the Pacific Ocean, temperatures should remain stable and pleasant even in winter. However, heavy winter rains, along with slightly colder temperatures, can make off-season trips fairly miserable.

2. How Long?
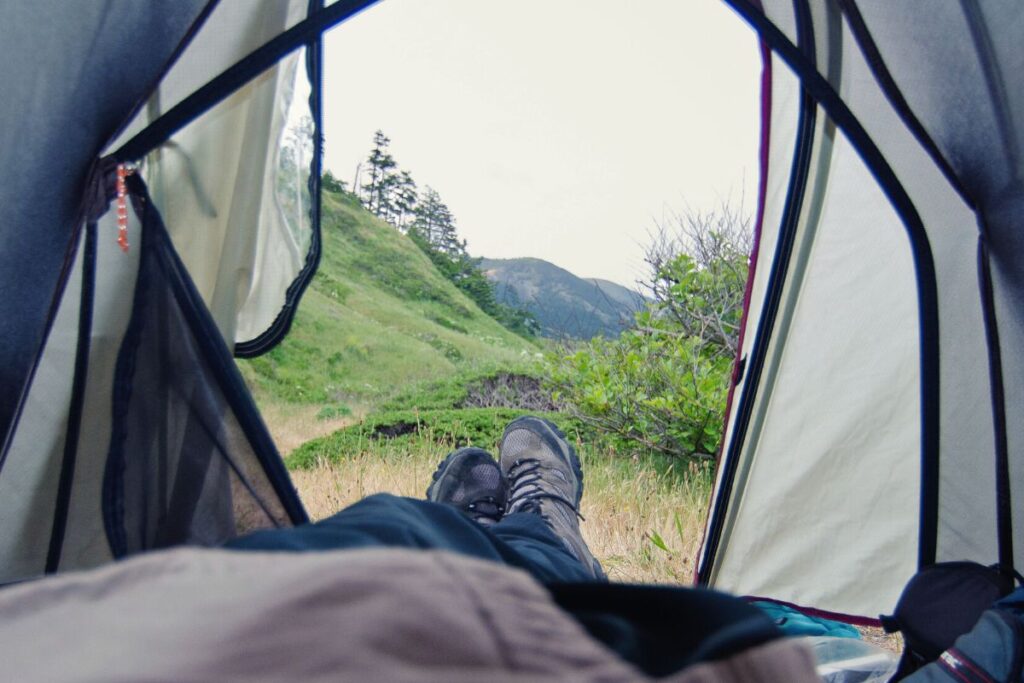
The Lost Coast Trail is a 24.6-mile point-to-point (one-way) hike that typically takes 3 to 4 days to complete. Depending on your preferred pace, plan either for a 2-night, 3-day trip or a 3-night, 4-day trip.
If you don’t want to organize a shuttle back to get from one of the trailheads to the other, you could hike it as an out-and-back. If you do this, that will make this a 50-mile and truly challenging, epic round trip.
3. What Permits Do You Need?
The required permit to backpack the LCT is a King Range wilderness permit which allows for overnight camping anywhere on the trail. This permit is valid year-round and covers the entire King Range National Conservation Area. Permits are only required for backpacking trips and not for day hikes.
One permit can cover up to 3 people. You must start your hike on the start date listed on your permit. This is strictly enforced. There are no walk-in permits. You must use the King Range online permit system to obtain one.
You can get a backpacking permit at any time if they’re available, but they tend to go quickly. Every year, permits are released on October 1st for the next year, so 2023 permits are released on October 1st of 2022.
Though most Lost Coast Trail permits are snatched up almost immediately, you can get lucky if there is a cancellation – just be prepared to check the website frequently!
4. How To Get There?
Located in Northern California, the King Range National Conservation Area is approximately 230 miles north of San Francisco or about 60 miles south of Eureka. To get there make sure your car is in good working order with sufficient gas, as the roads to the conservation area are steep, narrow, and winding.
Most people who hike the Lost Coast park their car at one trailhead and take a shuttle to get back to their car after completing the hike. We recommend organizing this shuttle at the start of your trip so you won’t be pressed for time to make your shuttle at the end of the trail.
To book a shuttle between trailheads, call as soon as you have your permits to book the pick-up date, time, and location for your trip.
The following shuttle services have all the necessary recreation permits to transport you and other backpackers in the King Range Conservation Area: Mendocino Insider Tours and Lost Coast Adventure Tours. Remember, book your shuttle early to ensure this essential part of your trip is planned.
5. Where To Camp?
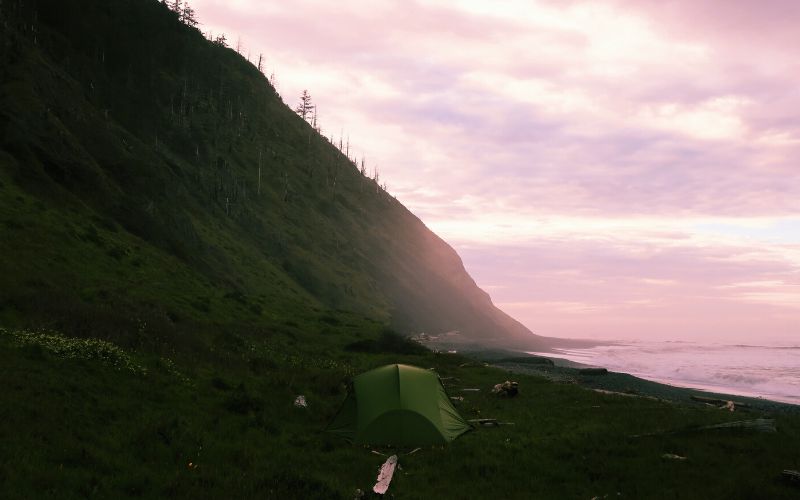
With a King Range Wilderness permit, camping is allowed anywhere along the trail. However, you should limit this to areas that have been camped in before to ensure you’re safe from ocean tides and to preserve the area you’re sleeping in. Camping is permitted at the Mattole Beach Trailhead but not at the Black Sands Beach Trailhead.
What To Expect When Hiking The Lost Coast Trail?
There are 4 main stages to explore along the Lost Coast Trail as outlined in the following list.
- Stage 1: Mattole Beach to Punta Gorda
- Stage 2: Punta Gorda to Cooskie Creek
- Stage 3: Cooskie Creek to Big Flat
- Stage 4: Miller Flat to Black Sands Beach (Shelter Cove)
Stage 1: Mattole Beach to Punta Gorda
The first section from Mattole Beach to Punta Gorda, involves walking over grassy dunes, beaches, and creeks. Situated on the northern edge of the King Range Wilderness Area, the Mattole River Valley and Beach are worth exploring before beginning the Lost Coast Trail, so plan to arrive early.
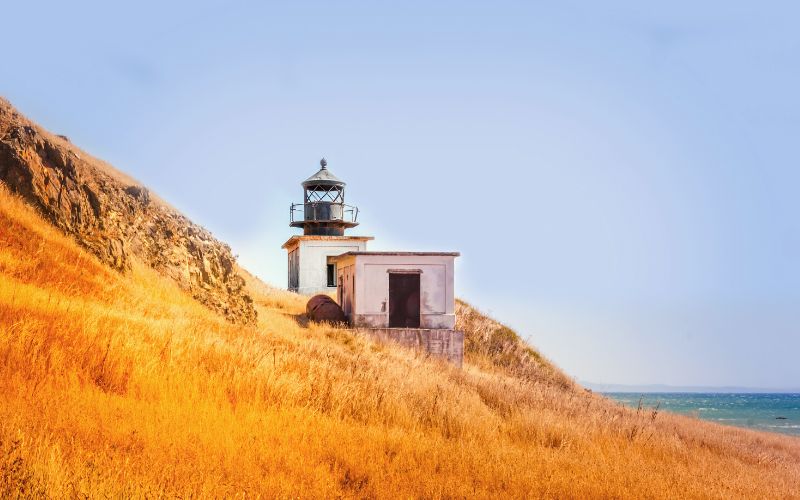
The trail itself starts at the Mattole Beach Trailhead, featuring a primitive campground with 15 tent and trailer sites and providing potable water and vault toilets. It’s close to the Mattole River and heads through grass-covered dunes for the first two miles of trail. This is a coastal prairie ecosystem, and you may see a jackrabbit or two, and possibly a rattlesnake! This part of the trail has long been used to bring supplies to the Punta Gorda Lighthouse.
The trail then goes onto the beach and goes around Punta Gorda, which is inaccessible at high tide. Once you come around this corner, you’ll be able to see the Punta Gorda Lighthouse. Sea lions can often be seen on the rocks in this area, so get your camera ready!
At this point you’ll cross Fourmile Creek, one of several creek crossings on the route (look out for river otters!). In the summer it usually isn’t deep, though. Now, you’re just about at the Punta Gorda Lighthouse.
Stage 2: Punta Gorda to Cooskie Creek
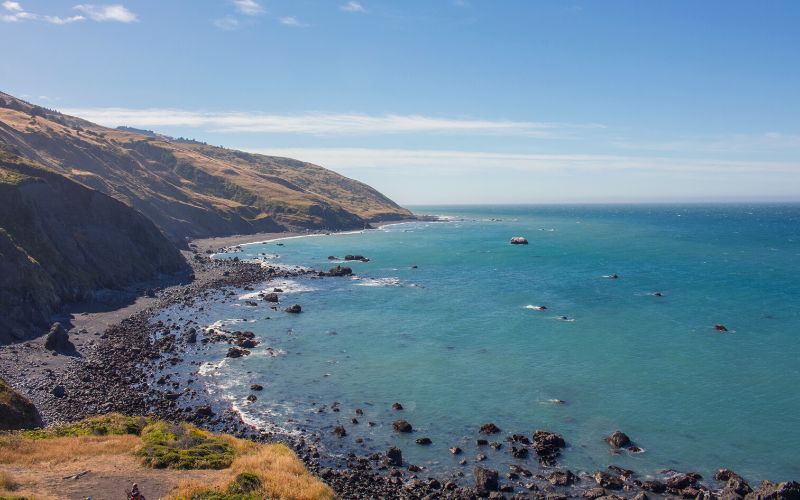
The second stage of this trail takes you from the Punta Gorda lighthouse to Cooskie Creek. Be aware that prior to reaching Sea Lion Gulch a beach section has to be traversed that is impassible at high tide. Make sure to consult a tide chart before heading down to the beach.
After passing the lighthouse, the trail leaves the beach for a bit. The walking will be easier here as you leave the sand behind. You’ll follow a dirt trail on the grassy hills looking down on the beach for another mile. From here you can see the remains of some shipwrecks, which make quite the spectacle.
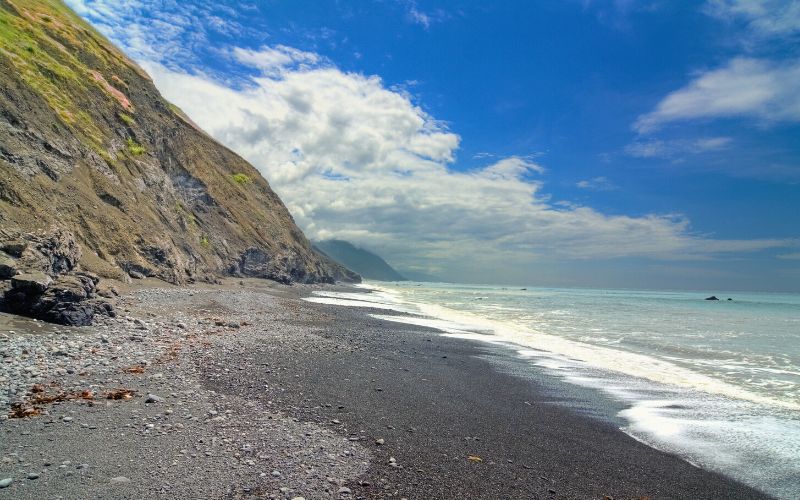
You’ll be getting close to Sea Lion Gulch now. The cliffs along the beach are steep here as the trail winds back down to the waterfront. This is where the 4-mile stretch of beach that’s impassable at high tides lies, so make sure you know the tide schedule before you start crossing it.
The next few miles are challenging. The beach consists of baby-head rocks that will shift as you step on them. Watch for falling rocks from the crumbling cliffs above, too. There will probably be more sea lions in this area, too, but don’t let them distract you from your footing!
After two miles of walking the beach, you’ll arrive at Cooskie Creek, where you’ll find a safe spot to camp above the high tide line.
Stage 3: Cooskie Creek to Big Flat
The third stage takes you from Cooskie Creek to Big Flat. This section offers great camping at Randall Creek, additional recommended hiking on the Spanish and Kinsey Ridge Trails, and views of Shubrick Peak and Big Flat.
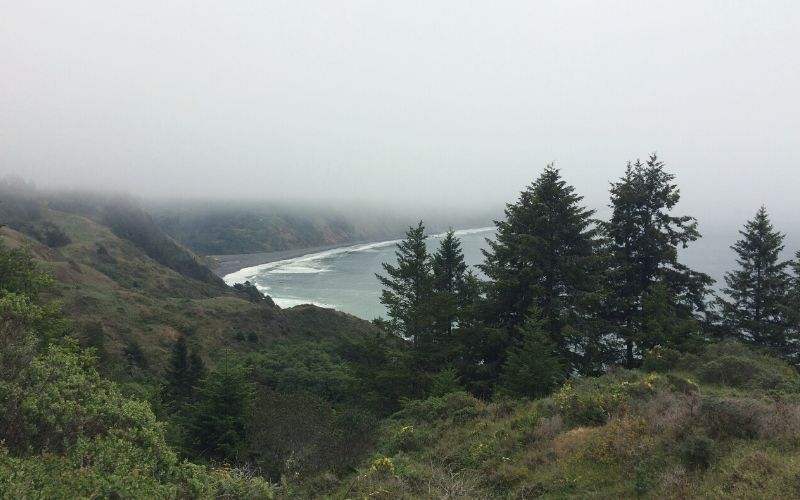
From Cooskie Creek to Randall Creek, the trail is a beach that is underwater except during low tide. This is where the real Lost Coast wilderness hiking experience begins. You’ll walk below cliffs that are constantly pummeled by the ocean, and they look like it, too. You’ll see evidence of landslides–exposed hillsides, the works. Keep moving through here, but be sure to take it all in!
When you get to Randall Creek, you’ll probably want to take a break or even stop for the day. There’s great camping in this area if you’re ready for a rest.
As you go further south, you pass the Spanish Ridge Trail. This is a worthwhile side trail and provides awesome views from the high terrain above the Lost Coast. It’s steep though, so be prepared for plenty of calf burn!
After the Spanish Ridge, you’ll once again leave the beach and walk through coastal prairie. This will be a nice break from the sand and rocks you’ve been walking over for the last few miles. There is a lot of good overnight camping in the area as you cross Spanish Creek, too.
In another 1.5 miles, you’ll see another side trail, the Kinsey Ridge Trail. Then, you’ll cross the impressive Kinsey Creek, before passing Big Creek. If you haven’t caught on yet, there are plenty of creeks on the Lost Coast Trail.
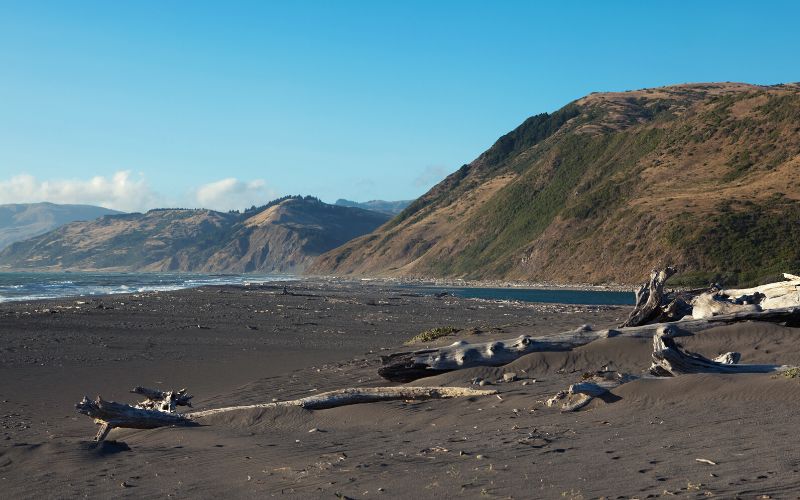
Next, you pass below Shubrick Peak, which looks down over the beach from its 2,797-foot summit, before the trail climbs up to a spot with an epic view of Big Flat. Yes, Big Flat is big and flat. This is a spot where driftwood likes to congregate, too. There are also some private cabins in the area.
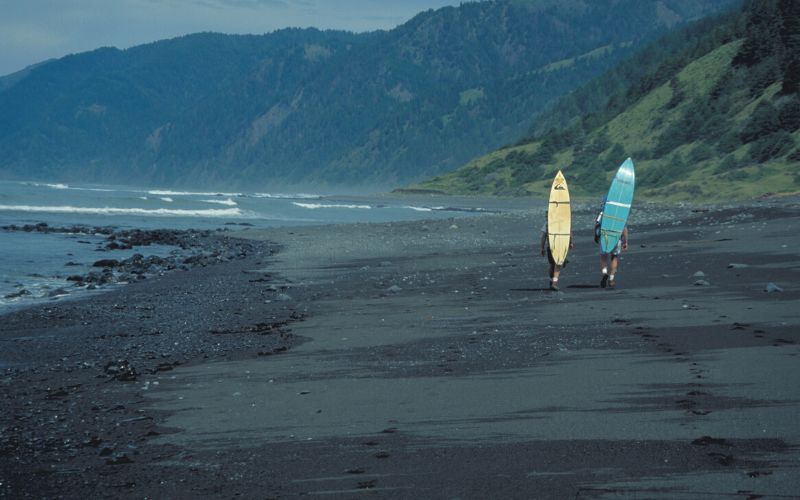
Big Flat is home to a wide variety of wildlife. You might see deer, jackrabbits, foxes, bobcats, or black bears around here. This area is also popular with surfers, who will hike their boards in from the Black Sands Trailhead to catch some waves. There is ample camping near Big Flat Creek, too.
Stage 4: Miller Flat to Black Sands Beach (Shelter Cove)
The fourth and final stage is from Miller Flat to Black Sands Beach in Shelter Cove, with a further option to continue through Sinkyone Wilderness State Park. Some sections along this stage also require some consideration of the tide schedule.
Once you cross over Big Flat Creek, Big Flat becomes Miller Flat (it was just too big to have one name!). In all seriousness, Miller Flat has one major difference from Big Flat, and that is the massive ridge you’ll be walking beneath. With Miller Ridge to your left and the ocean to your right, the next 4 ½ miles are impassable at high tide.
You’ll walk along a slim strip of rock, with the ocean on one side of you and towering cliffs on the other. You do have a couple of options to wait out the high tide during this stretch. Shipman Creek and the sandy beach at Buck Creek both have spots to camp to avoid the tide.
As you get close to Gitchell Creek the beach gets wider. This area is passable during high tide. You will have made it through all the unpassable zones by now. However, the sand here is loose and more like gravel, so expect to hike slower in this area. There’s plenty of driftwood around tide pools, and shorebirds are everywhere as well.
Soon, you’ll be arriving at Black Sands Beach and Shelter Cove, which is the end of the northern section of the trail. Stop to take some pictures of the black sand beach with the Pacific Ocean as a stunning backdrop.
At the Black Sands Beach Trailhead, you will be officially done with your Lost Coast backpacking trip. There are food and drinks at the Shelter Cove general store nearby. There is no overnight camping at the Black Sands Beach Trailhead, but you can camp close by – the Bureau of Land Management allows camping north of Telegraph Creek.
That’s it! Now you will have completed the entire hike of the Lost Coast…
…unless that is, you want to extend your trip with a visit to Sinkyone Wilderness State Park. This park is south of here, and technically the Lost Coast Trail continues through here. If you want to hike Sinkyone Wilderness State Park, your best bet is to drive three miles south to the trailhead.
What Hazards Are On The Lost Coast Hike?
The list below indicates hazards to avoid or be aware of while enjoying the Lost Coast Trail.
- Tidal Zones
- Rattlesnakes
- Bears
- Ticks
- Poison Oak
- Sneaker Waves
- Uneven Terrain
1. Tidal Zones
There are three tidal zones along the trail that are impassable when the tide is higher than 3 feet. Avoid attempting to pass these areas during high tide or when the tide is rising faster than you can cross them.
Consult the NOAA tides and predictions page for more information on when high tides are predicted. There are usually two high tides and two low-tide periods per 24-hour period. Plan ahead, and consult the tides predictions page when you’re selecting a permit date as well.
If hiking southbound, the first impassable zone you’ll cross is just south of Mattole beach trailhead. The second impassable zone is about 4 miles long and is just south of Punta Gorda Lighthouse between Sea Lion Gulch, Cooskie Creek, and Randall Creek. The third zone is also about 4 miles long as well, between Miller Flat and Gitchell Creek.
2. Rattlesnakes
The Northern Pacific Rattlesnake is common throughout northern California. Rattlesnakes like to hang out in sunny, protected spots so be aware of where you step in these areas.
If you see a rattlesnake, it will probably have noticed you already. It will be warning you with its rattle not to come any closer. Give it space – a rattlesnake will only strike if it feels threatened and that will only happen if you get too close.
3. Bears
As with any wilderness area in Northern California, bear encounters are relatively frequent on this trail. Use a bear canister for food storage (more details below) and carry bear spray for added peace of mind.
4. Ticks
Ticks are prevalent on the Lost Coast. For this reason, most people opt to wear pants and long sleeves for protection from tick bites since some carry Lyme disease. Treat clothes with Permethrin and use Deet bug spray on your legs if you aren’t wearing pants.
The best way to avoid ticks is to not walk through overgrown areas with tall grass. If it looks like there could be ticks hanging out somewhere waiting to find a mammal to latch onto, don’t walk through that spot unless you have to. Perform tick checks periodically throughout the day, especially after taking breaks where you sat in grassy areas.


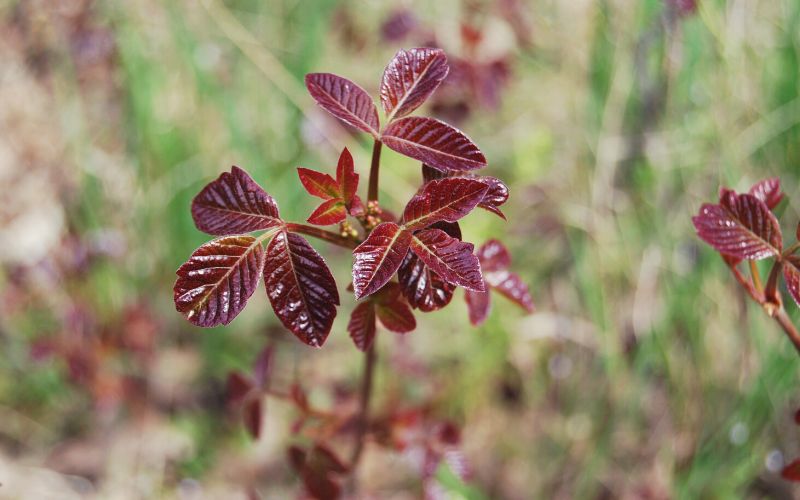
5. Poison Oak
There is plentiful poison oak in brushy areas along the Lost Coast Trail. Learn to identify poison oak and watch out for it, especially near the many creeks en route. Remember “Leaves of three, let it be”.
This is another reason to wear pants on this hike, if your skin does touch poison oak, vigorously wash the area with soap and water as soon as possible. Wash your trekking poles and any other gear that might have touched the plant after your hike is over, too. The oil from this plant stays toxic for a long time, and you don’t want a surprise rash later.
6. Sneaker Waves
Sneaker waves are common at specific points along the Lost Coast and can sweep away unsuspecting hikers. These are large ocean waves that emerge without warning so to avoid them, pay attention to the Lost Coast tides, don’t stand with your back to the water for long periods, and avoid hiking at night.
7. Uneven Terrain
The terrain of the Northern California coast is often uneven, rapidly transitioning from packed sand to small pebbles and larger rocks. The uneven-sized pebbles and rocks are notoriously challenging to walk over, making this hike unsuitable for individuals with knee or ankle issues. Some sections require scrambling over rock outcrops where coastal cliffs extend into the ocean.
Wear sturdy hiking boots with adequate traction for scrambling for your backpacking trip and bring trekking poles for balance.
What Gear To Pack For Lost Coast Backpacking?
Listed below are specific items to pack when backpacking the Lost Coast Trail.
- Bear Canisters
- Rain Gear
- Cold-Weather Gear
- Water Filter
1. Bear Canisters
In the King Range Wilderness, store your food in an approved, hard-sided bear canister such as the BV500, or choose from the complete list of approved bear canisters. You can also rent a canister from the ranger station, but in summer, they might all be taken, so plan accordingly.
You’ll need to store all your food and scented items in your bear canister overnight. Bear canisters are also convenient for protecting your food from all the “mini-bears” – raccoons and squirrels!


2. Rain Gear
The Lost Coast can be chilly and wet year-round, so packing rain gear is essential. Even in summer, the fog and mist from the ocean can result in a good soaking, so bring a quality rain jacket and rain pants to stay dry.
3. Cold-Weather Gear
Overnight trips on the LCT can be surprisingly cold, even in the summer, so cold weather gear is recommended too. Particularly when camping on the beach, ensure you have a quality sleeping bag, puffy jacket, gloves, and a beanie to ward off chilly ocean breezes.
Bringing a camping stove is a good idea, too. A hot cup of coffee while watching the ocean in the morning sounds nice, doesn’t it?
4. Water Filter
There are plenty of creeks along the Lost Coast Trail to collect water from but you’ll need to filter it before drinking. Pack a lightweight water filtration device for this reason, we like the Sawyer Squeeze for it’s small and convenient deign.


Fancy Backpacking The Lost Coast Trail, California?
We hope you found this guide to backpacking the Lost Coast Trail helpful in planning your next adventure. Have any questions? Did we miss something? Leave us a comment below!
And as always, feel free to share this with a friend!